Let me start by saying this: I know the chaos of an unorganized craft room all too well.
Paintbrushes buried under fabric scraps, glitter hiding in corners you didn’t know existed, and scissors that mysteriously vanish just when you need them (seriously, where do they go?!).
For the longest time, my craft room was where creativity went to thrive—but only if I could find what I needed first. Sound familiar?
That’s when I decided it was time to take control and turn my craft chaos into craft confidence.
I started experimenting with clever storage hacks, purged the supplies I didn’t need, and found ways to make my space functional and inspiring.
If you’re nodding along because your craft room feels more like a cluttered storage closet, don’t worry—I’ve got you.
Whether you’re working with a full room or just a corner of your house, I’m going to share my favorite craft room organization ideas (from personal wins and Pinterest-worthy tips) that will help you organize your space, spark your creativity, and actually enjoy walking into your crafting zone.
1. Use Wall Organizers to Declutter Your Craft Room
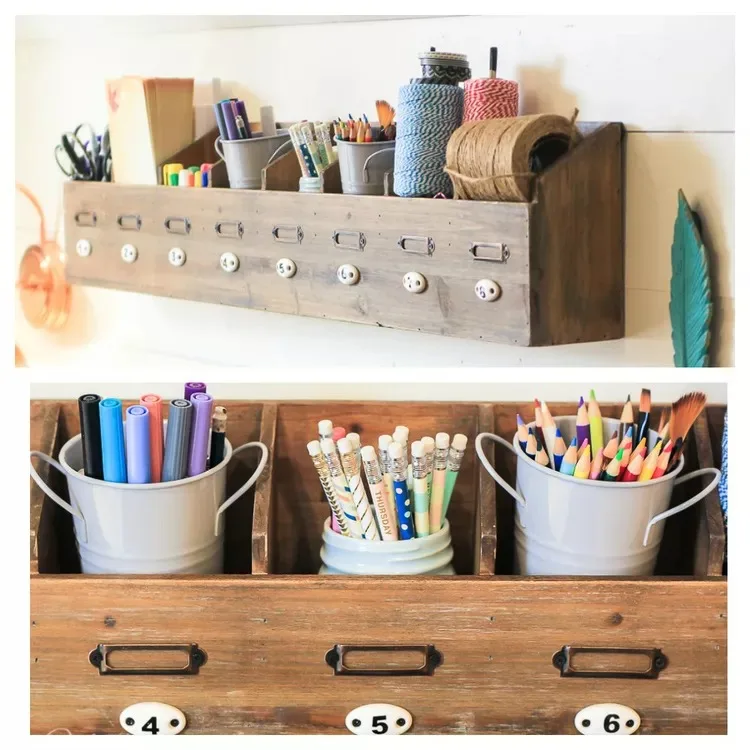
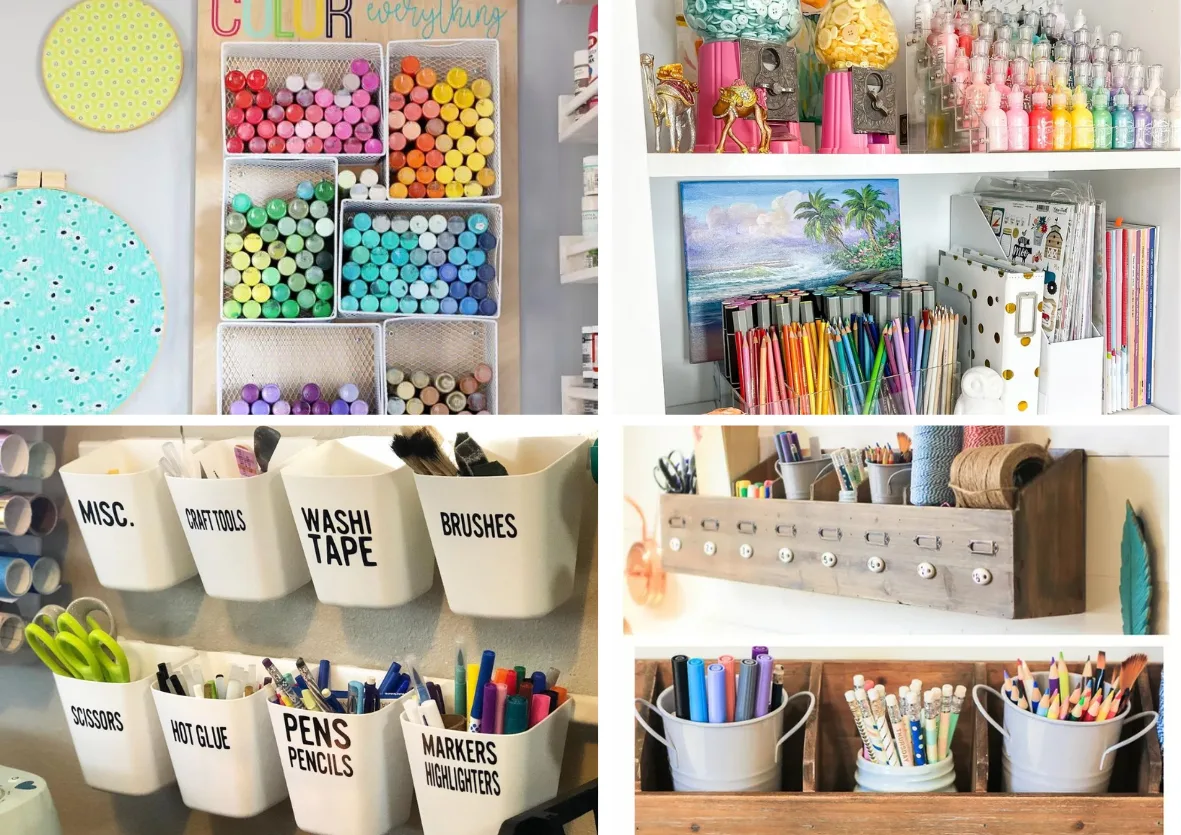
I love how this rustic wall organizer combines charm and function. The numbered compartments mean everything has its place.
I use the small metal buckets for pencils, markers, and other tools I reach for often. It keeps my craft room looking tidy and saves me so much time digging around for supplies!
2. Maximize Vertical Space with a Ladder Organizer

This vertical ladder setup is a lifesaver for small spaces. I hang buckets filled with paints, markers, and even scissors—everything’s visible and easy to grab.
It’s ideal for tight spaces since it goes up instead of out. Plus, you can rearrange the buckets based on your current project, which I find super handy.
3. Keep Wrapping Supplies Wrinkle-Free with Door Storage
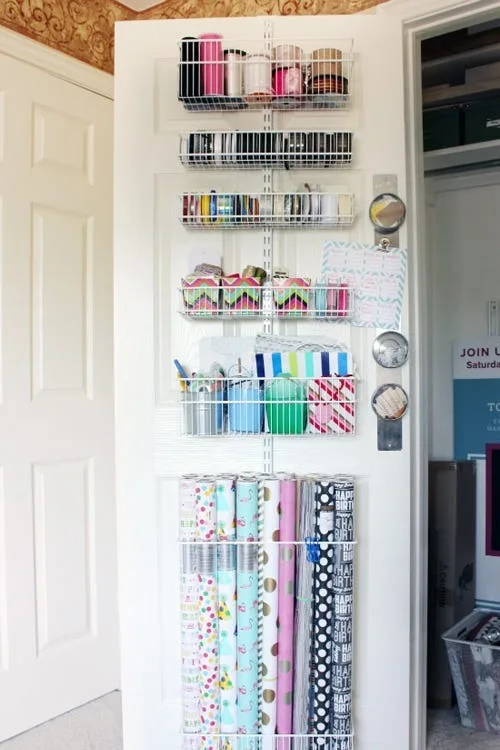
This over-the-door storage has been amazing for corralling wrapping paper, ribbons, and more. Rolling gift wrap into a drawer? The worst.
Now, I’ve got a bottom section for rolls and smaller baskets above for tape and scissors. Everything’s wrinkle-free and ready when I need it. It’s such a simple but genius fix!
4. Try a Rotating Organizer for Easy Access to Small Items
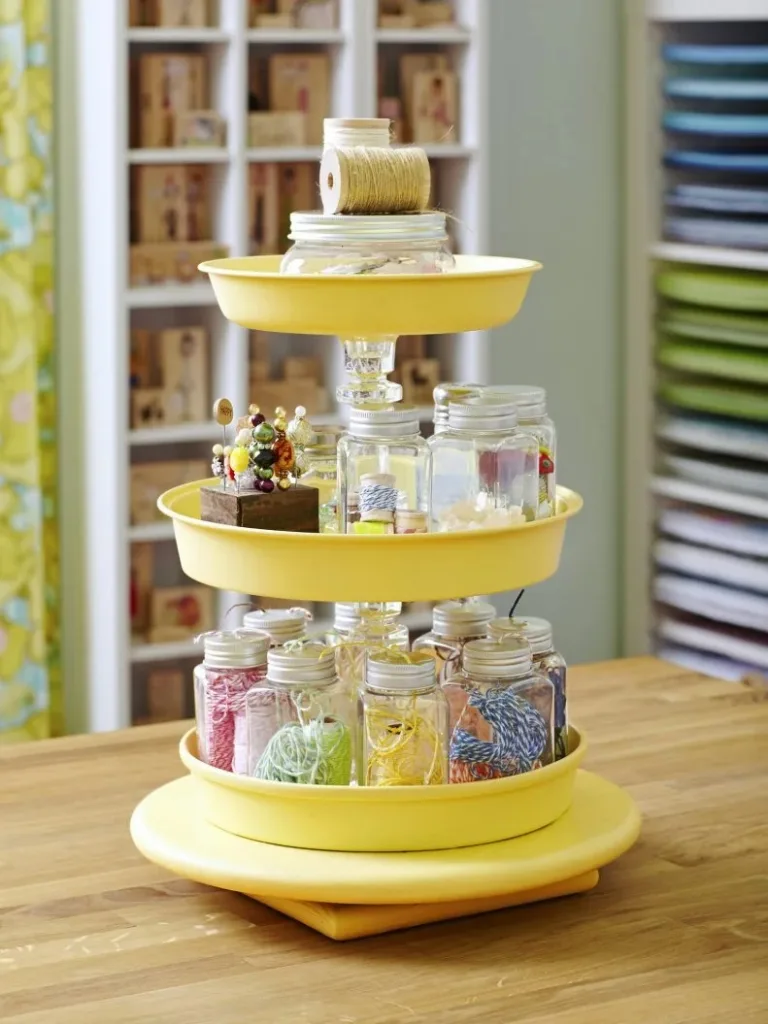
This three-tiered spinner is perfect for keeping tiny things like buttons and ribbon spools in check. I love how it fits so much without eating up counter space.
Just give it a spin, and whatever you need is right there. Plus, it looks cute sitting on my crafting table—practical and stylish, all in one!
5. Label Your Tools with Wall-Mount Buckets
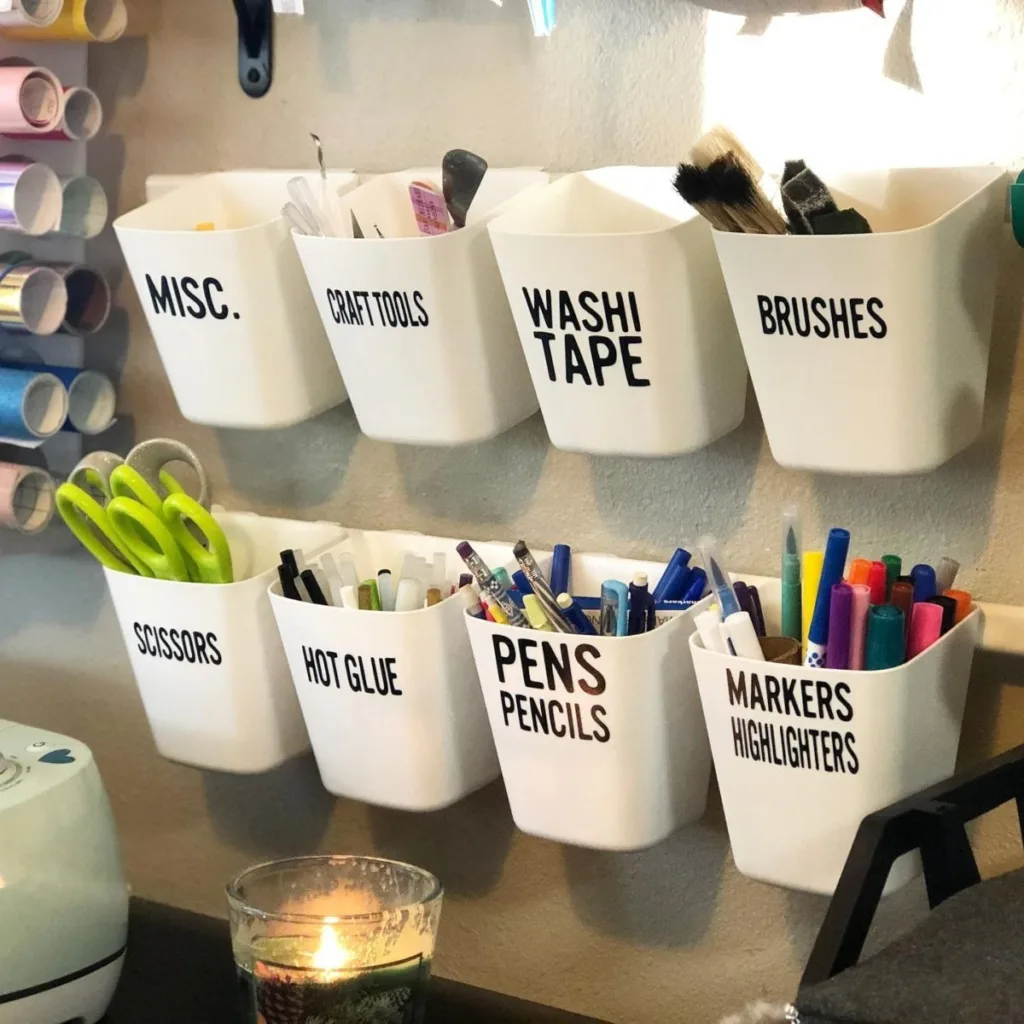
Wall-mounted labeled buckets are game-changers for keeping tools handy. I’ve got one for scissors, another for brushes, and even one for craft tape.
Having everything labeled makes crafting so much easier and faster. And because they’re up on the wall, my desk stays totally uncluttered.
6. Organize Paints by Color for a Functional Display

Organizing paints by color isn’t just practical—it’s honestly inspiring. I hung up a wall rack just like this to show off my paint collection.
It’s easy to see every color at a glance, which makes starting a project feel exciting. Plus, it doubles as decor, adding vibrancy to my craft room!
7. Add Personality While Staying Organized
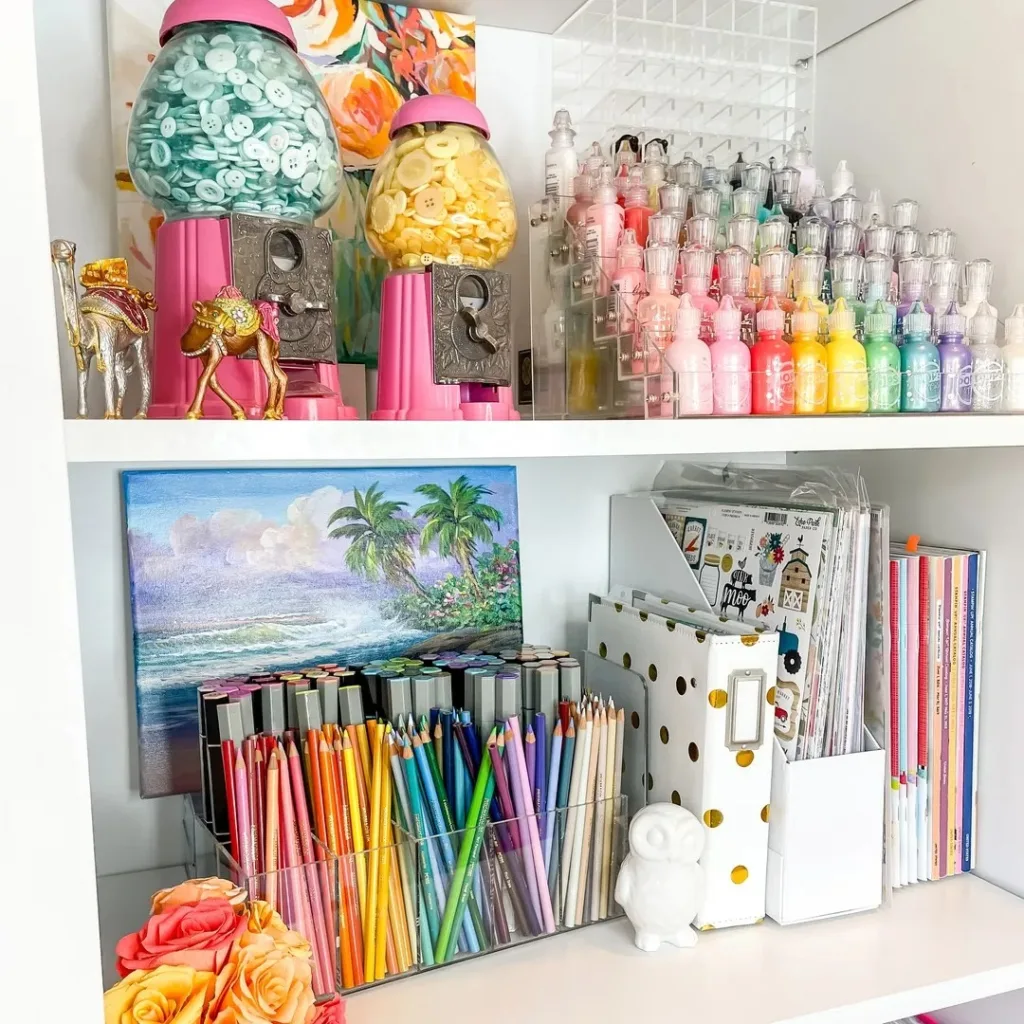
I love mixing organization with a little personality, and shelves like this are perfect for that. Clear containers hold my colored pencils, while gumball machines filled with buttons keep things fun.
Adding cheerful touches makes the space feel welcoming while keeping all my craft supplies within reach.
8. Turn Your Closet into a Hidden Crafting Station
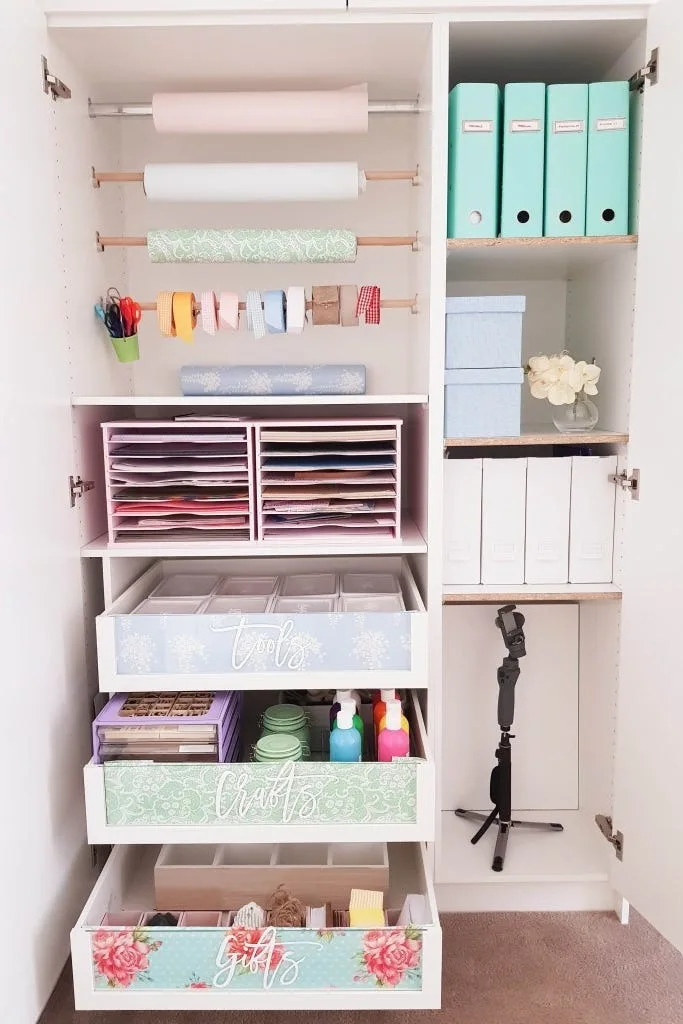
Turning a closet into a craft center? Total game-changer. I added drawers for paper, glue, and paints, plus rods to hang ribbons and gift wrap.
What’s great is you can close the doors and instantly hide everything! It’s a neat and efficient way to keep your supplies organized without cluttering your room.
9. Use Dividers to Organize Fabric Neatly
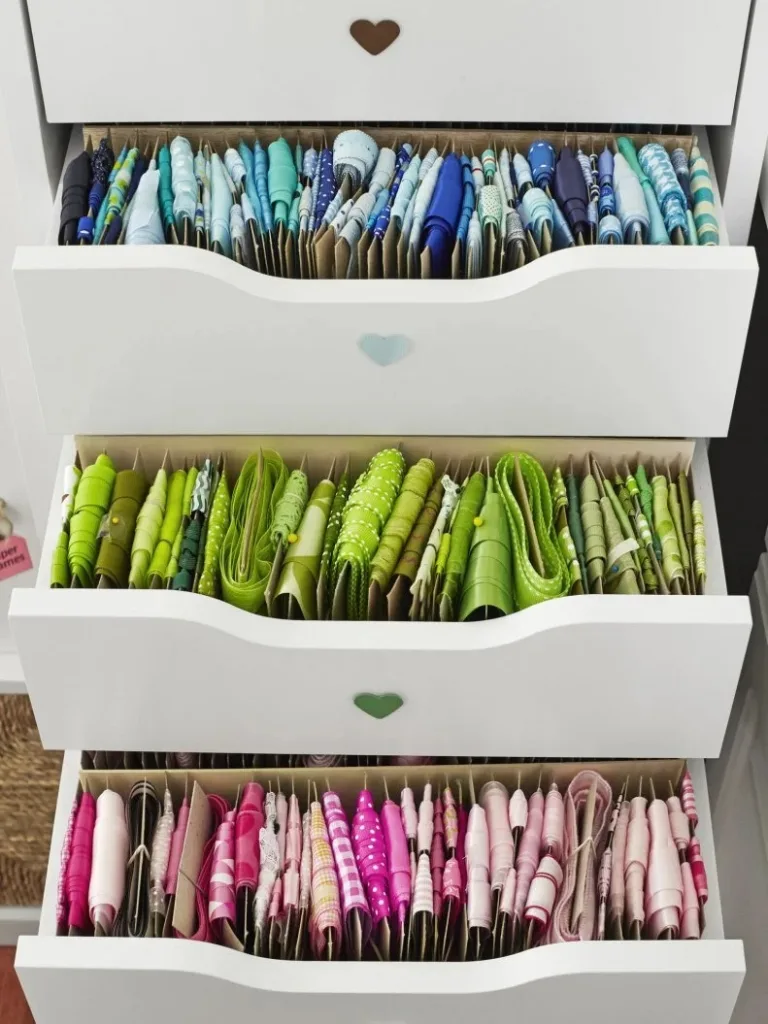
Drawer dividers are my secret weapon for fabric chaos. Folding and rolling each piece by color or pattern helps me find what I need in seconds.
I love how neat the drawers look every time I open them. No rummaging, no mess—just a perfectly organized display of my fabric stash.
10. Store Vinyl Rolls Vertically to Save Space
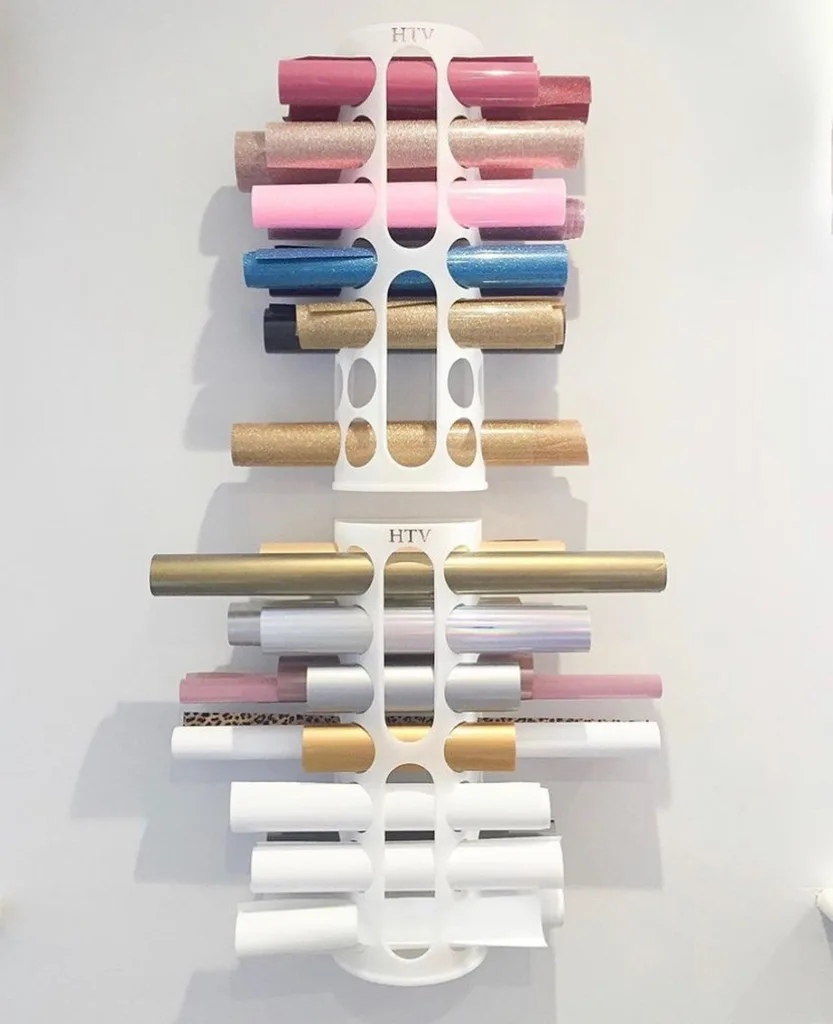
I used to throw my vinyl rolls into a bin and hope for the best, but this wall rack changed everything. Now, each roll has its own neat little space.
Storing them vertically helps keep the vinyl clean and uncreased. Plus, I can scan for the right color at a glance—so much faster than digging through piles!
11. Label Clear Drawers for Effortless Organization
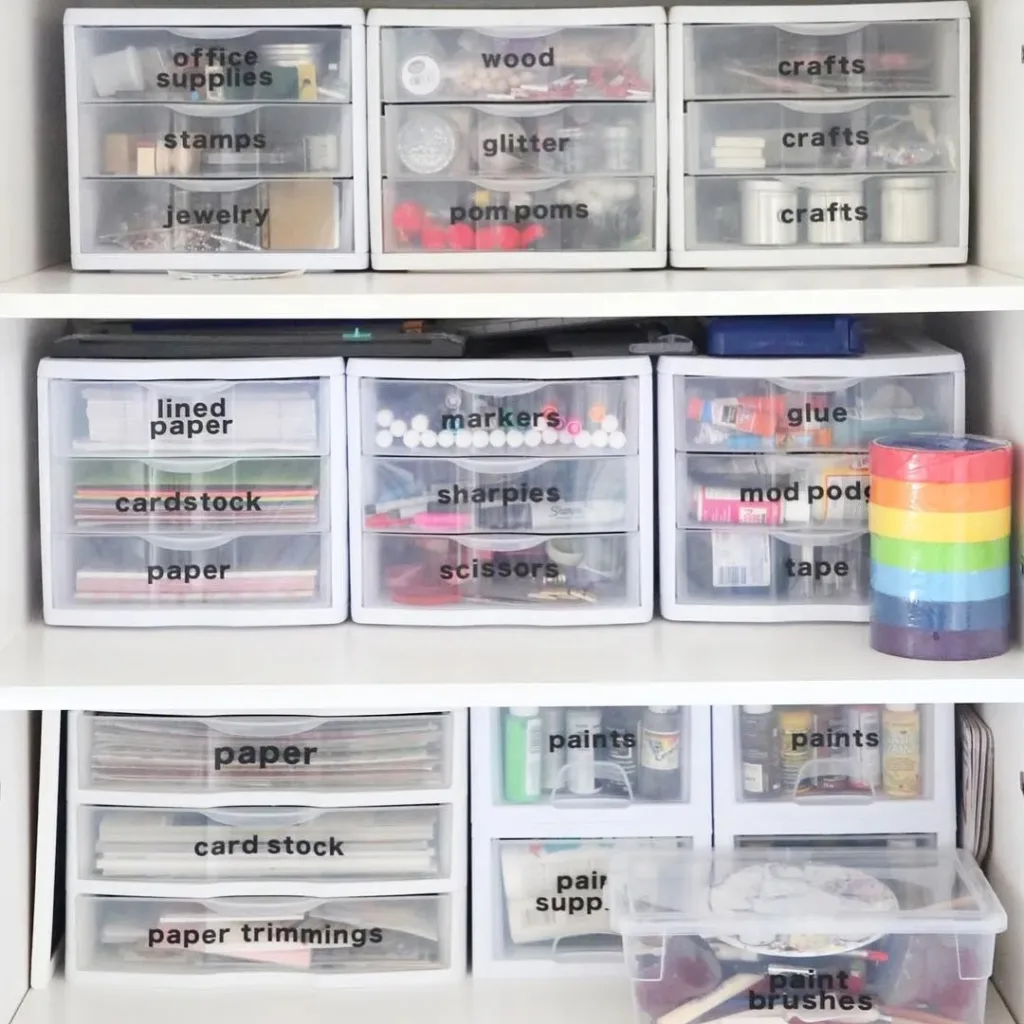
Plastic drawers are my favorite way to keep supplies sorted. I label each one—paints, glue, glitter, scissors—you name it.
The drawers stack easily and don’t take up much space. Tuck them under a desk or in your closet, and you’ll always know where everything is when you need it.
12. Hang Jars Under Shelves for Small Pieces
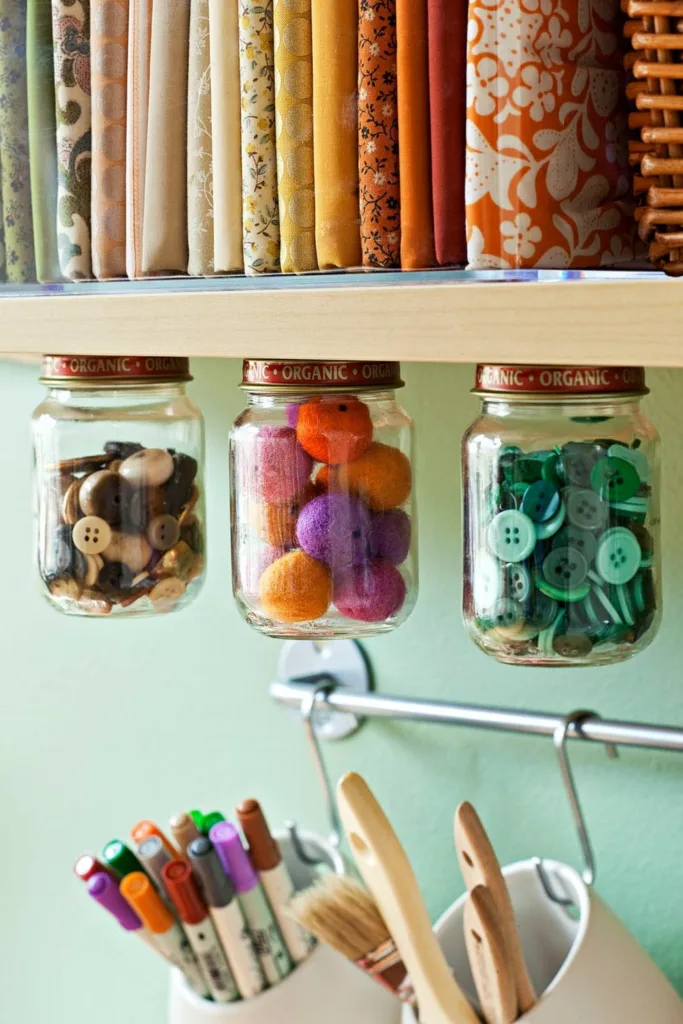
These hanging jars are an adorable way to save shelf space for small bits like buttons and beads. Mounting them upside down under a shelf? So clever!
You can see exactly what’s inside without opening anything. They’re great for freeing up desk space while keeping everything organized and accessible.
13. Use Pegboards and Shelves to Maximize Wall Space
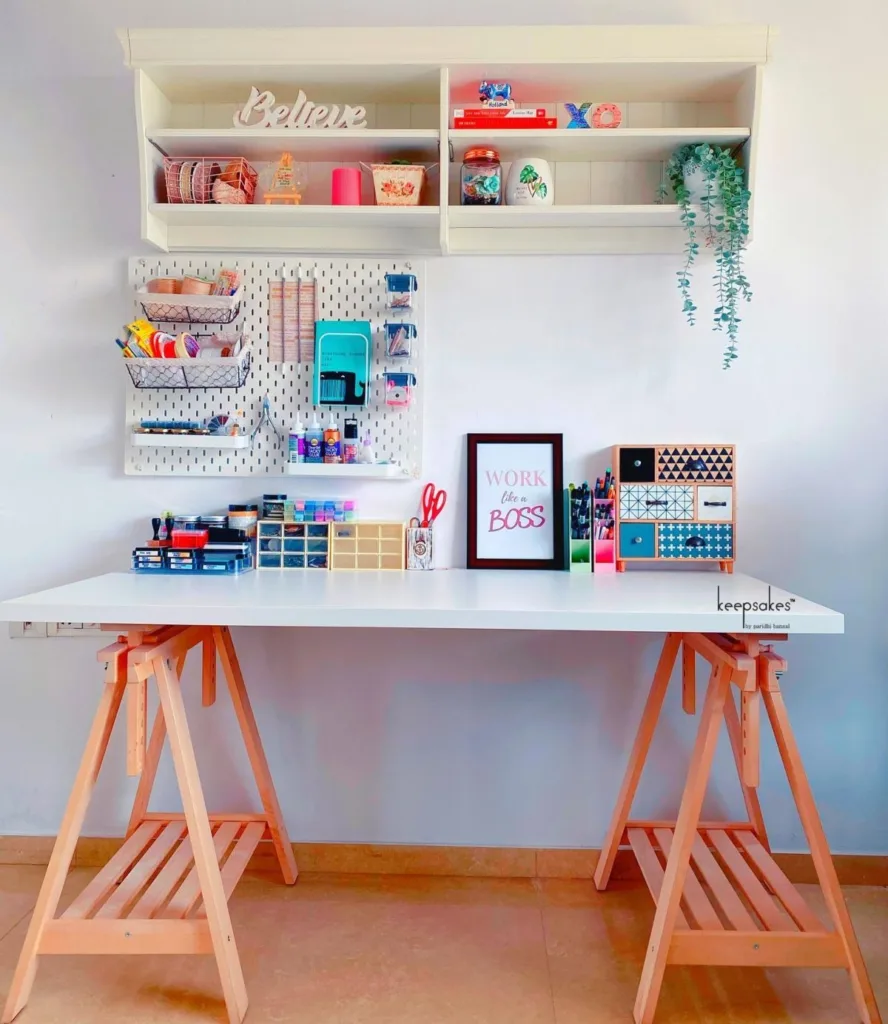
This was a game-changer for me! The pegboard helps keep small tools, like scissors and tape, within reach while freeing up workspace.
Adding shelves above for storing less-used supplies or decorations makes it even better. I also sprinkle in personal items, like motivational signs, to make it inspiring!
14. Turn Your Stamp Collection into Functional Decor

Displaying stamps on open shelves not only keeps them organized but also acts as decor. Everything is in full view and easy to access.
This tip works for buttons, threads, or any small craft tools you might have. Turning your supplies into decor can seriously brighten up your space.
15. Organize Craft Supplies with Rolling Carts
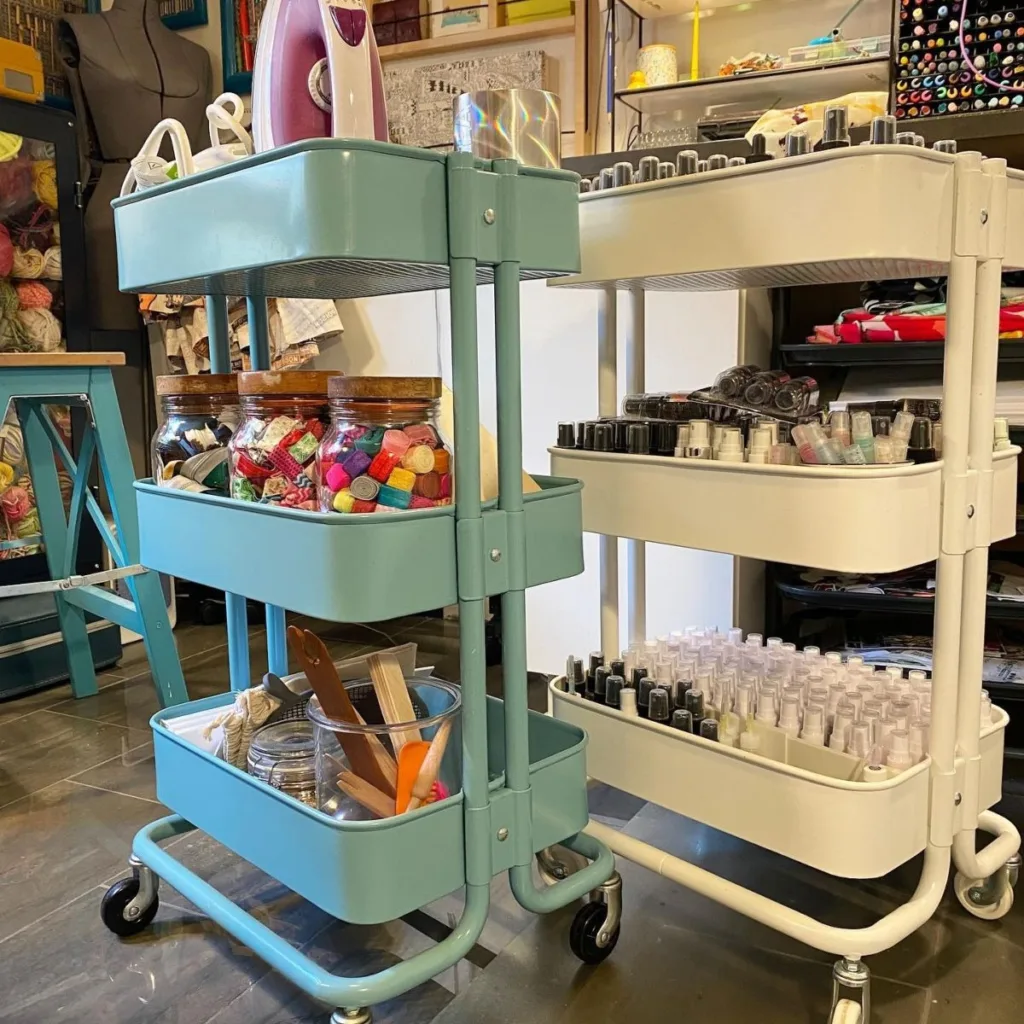
You can’t go wrong with rolling carts—they make staying organized easy and portable! Each tier can hold grouped items like paints, threads, or glues.
I love using one cart for sewing and another for painting. They roll wherever you need them, and keeping items grouped by project saves time and stress.
16. Sort Your Pencils and Markers by Color
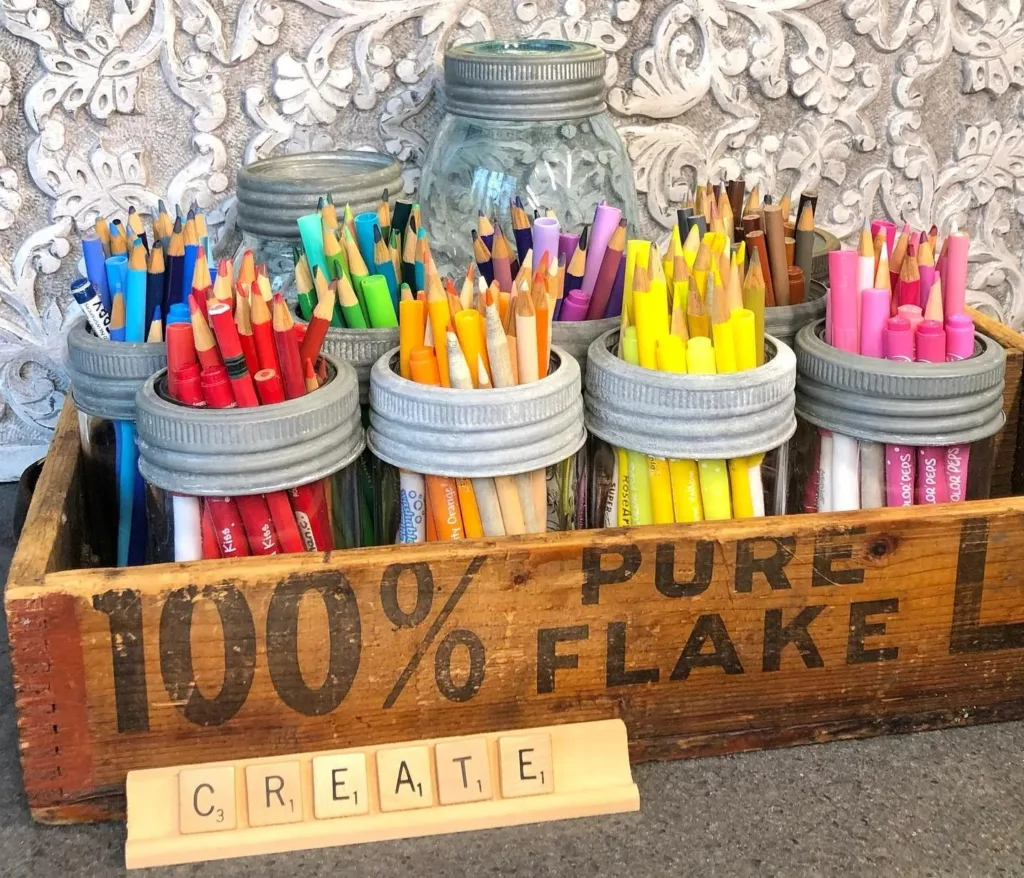
Grouping your pencils and markers by color in jars doesn’t just keep them handy—it creates a cheerful, inspiring look!
I use old jars for this, arranging them on a tray for portability. It’s efficient, easy to grab, and makes my workspace feel colorful and organized.
17. Use a Wall Rack to Free Your Desk Space
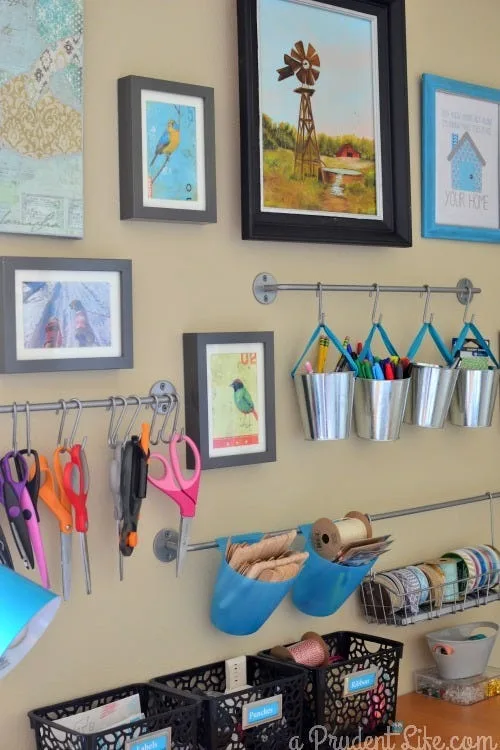
Wall racks are perfect for hanging tools like scissors and ribbons. Bonus trick: add small buckets for storing leftover craft supplies.
Decorate around your wall rack with inspiring art or photos to make it visually appealing. Using your walls well keeps your desk clear for big projects.
18. Create Colorful Fabric Cubbies for Easy Access
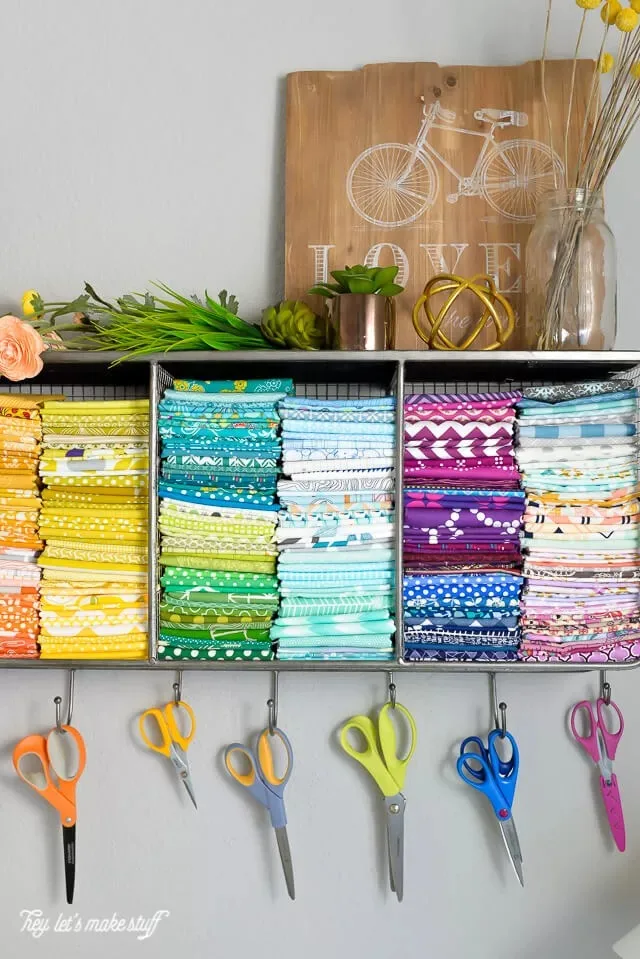
Folding fabrics neatly into cubbies grouped by color has saved me so much time. It also gives the space a pop of color and works as decor!
I added hooks underneath for frequently used tools, like scissors and measuring tape. It’s perfect for keeping sewing supplies tidy and within easy reach.
19. Keep Ribbons Neat on Open Shelves
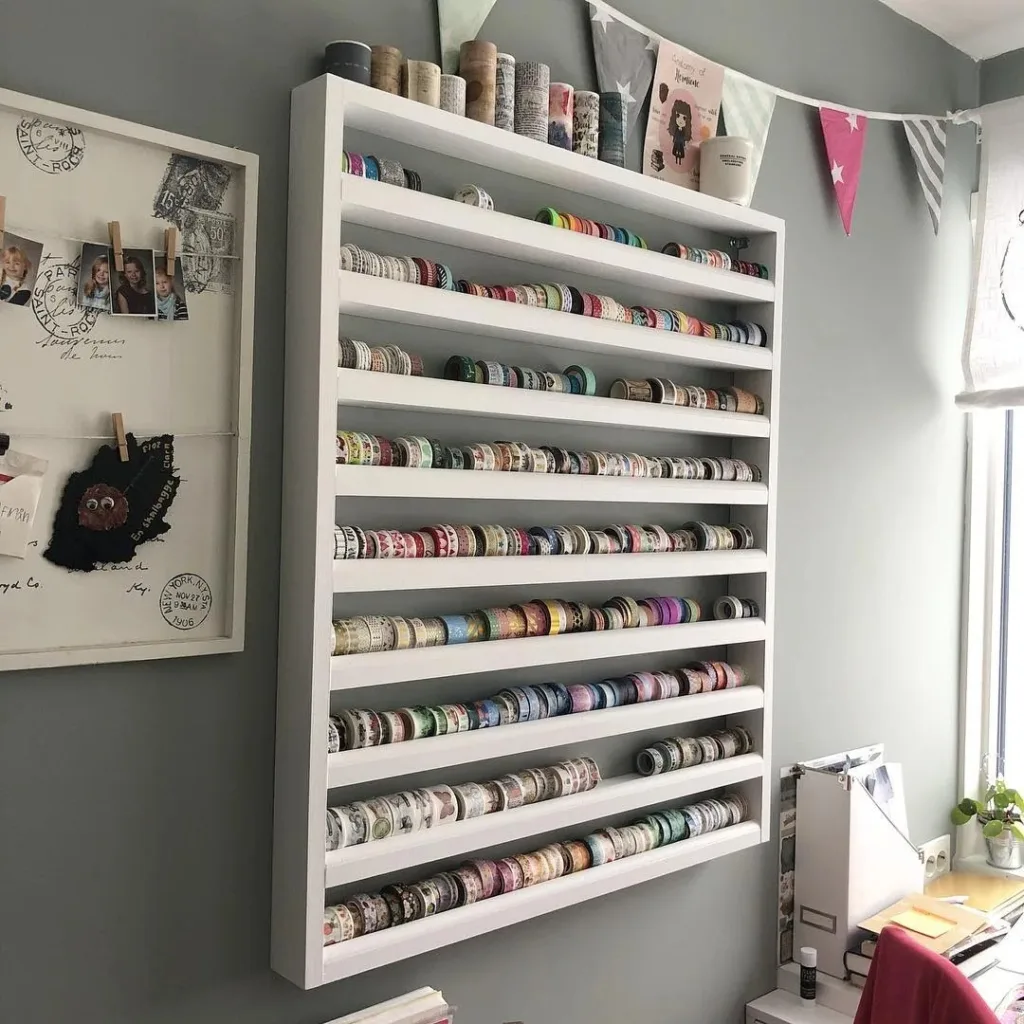
Lining up ribbons on open shelves keeps them untangled and easy to grab. This setup works for yarn or washi tape, too.
I like adding small baskets or jars underneath for extra tools. It’s a simple system that organizes supplies while adding charm to your workspace.
20. Store Washi Tapes in Clear Jars for Visibility
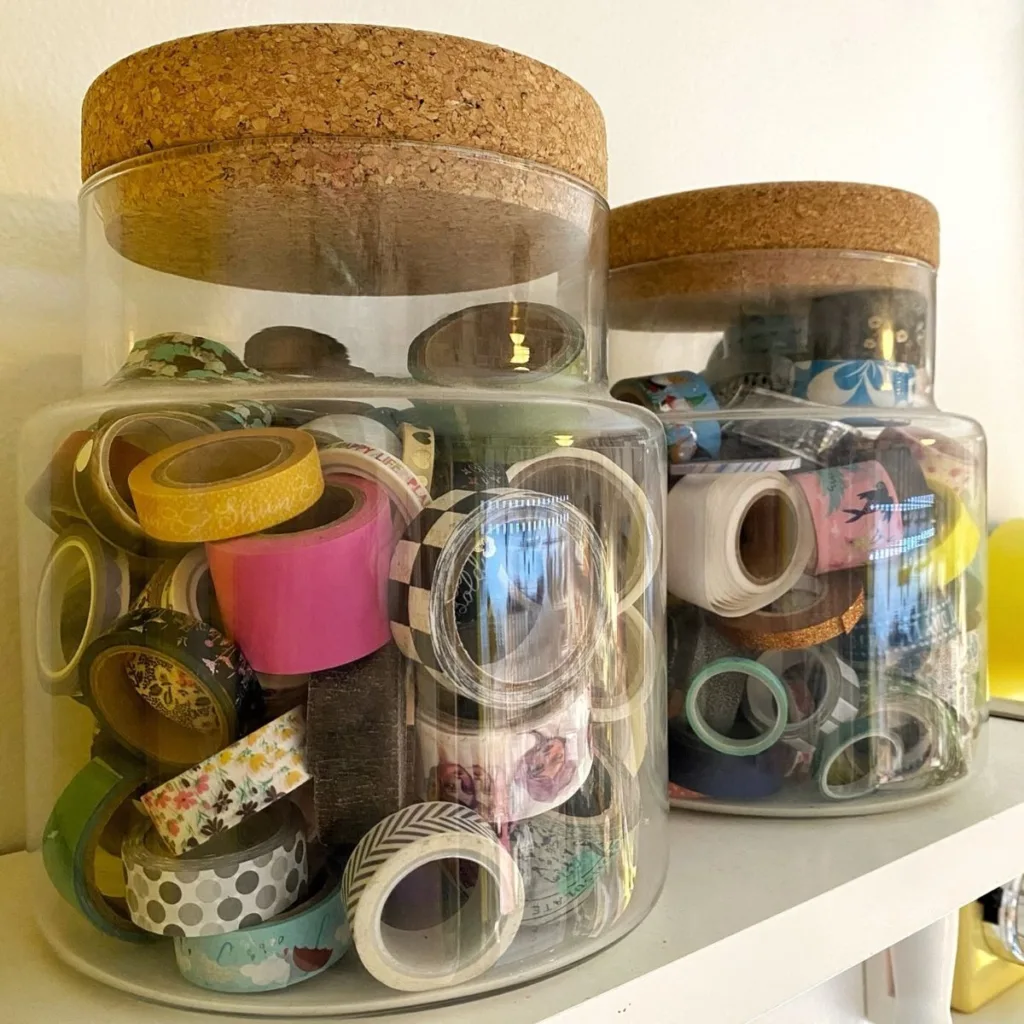
Clear jars make finding your washi tapes so much easier. You see every design at a glance, and the jars act as decor as well.
I mix jar sizes to store other items like twine or tiny brushes. Placing them on shelves or desks adds so much personality to your space.
21. Use Pull-Out Drawers to Arrange Fabrics Neatly
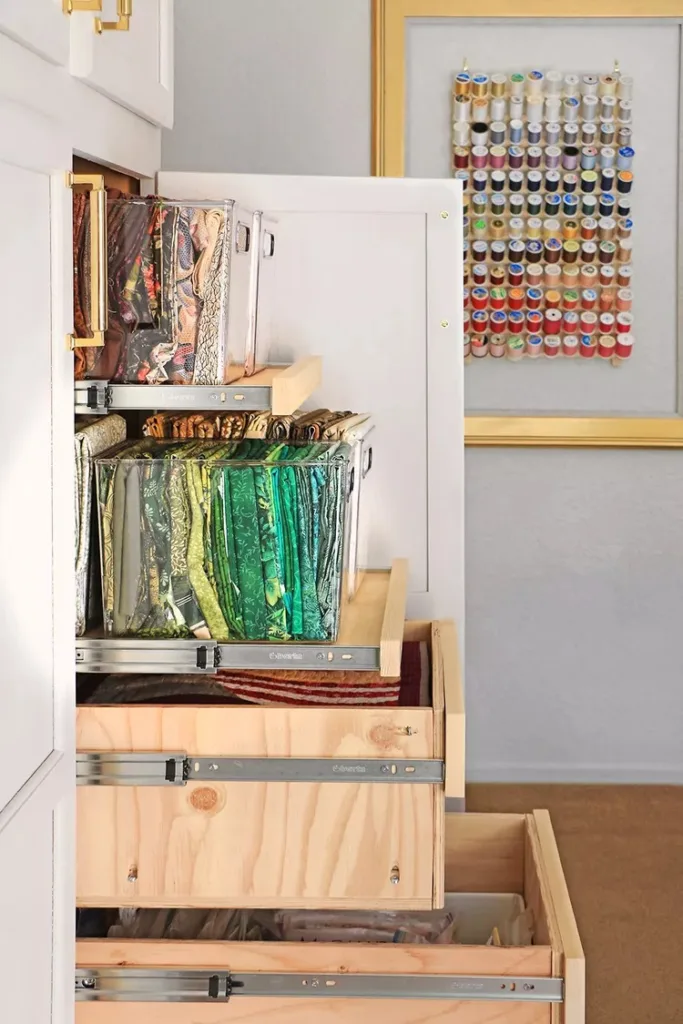
These pull-out drawers make stashing and finding fabrics quick and stress-free. I fold each piece neatly and label the sections for convenience.
The clear panels mean no digging through piles. You can also use these for other materials like quilting squares or embroidery supplies. It’s a total win for organization.
Conclusion
An organized craft room doesn’t just save time—it also makes your creative process more enjoyable and stress-free.
By incorporating these craft room organization ideas, you can create a functional, efficient, and inspiring workspace where creativity thrives.
Whether you’re a seasoned DIY enthusiast or just building your crafting setup, these tips can help you maximize your space and minimize clutter.
Start organizing today and watch your craft room become your favorite spot in the house!