You know what’s amazing? Creating a special little corner in your home where your kids can play, explore, and let their imaginations run wild.
And it doesn’t need to take up an entire room or cost a fortune.
Whether you’ve got a big family room or a tiny nook, a dedicated kids’ play corner can bring joy, learning, and calm to your space, and to your life.
Why a Dedicated Kids’ Play Corner Is a Game-Changer
Let me tell you from personal experience, having a designated play corner saves your sanity. No more toys all over the living room floor, no more stepping on Lego bricks in the kitchen.
More importantly, though, it gives your little one their very own space to be themselves. Kids thrive on routines and structure, and knowing they’ve got a special spot just for play helps them feel secure and inspired.
Plus:
- It teaches them independence and responsibility.
- It’s a great way to encourage creativity.
- You can visually contain the chaos with some smart storage!
Now let’s get into the juicy part, fun, stylish, and practical ideas to set up the ultimate kids play corner.
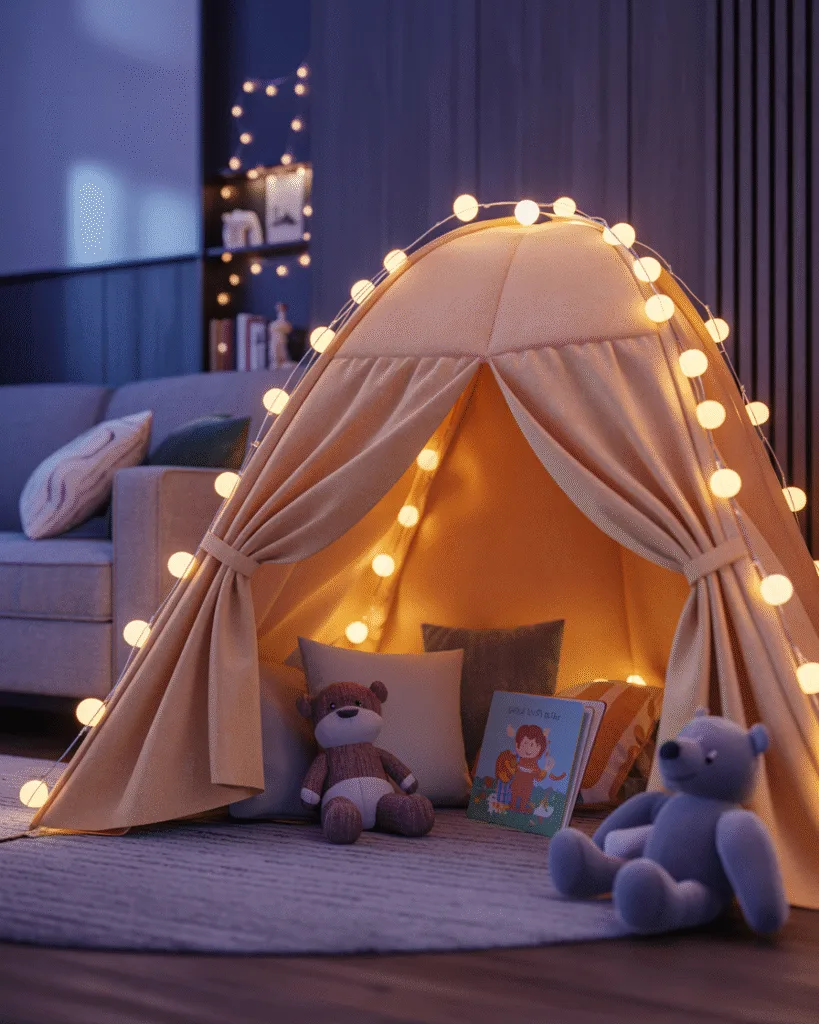
1. Scandi-Style Teepee Reading Nook

Alright, this one’s a personal favorite. I mean, who doesn’t love a cozy little teepee?
A Scandinavian-style teepee reading nook is minimal, light, and oh-so-inviting. It’s perfect if you want something calming that blends into your home’s aesthetic. I’ve seen these styled with neutral fabrics, fluffy rugs, and a sprinkle of fairy lights.
Break it down like this:
- Neutral canvas teepee with wooden poles
- Soft floor cushions or a faux sheepskin rug
- A low basket of books within easy reach
- Fairy lights or bunting for a touch of magic
Design Tip: Stick to muted tones like whites, beiges, and greys to keep it visually clean and calm. Add a couple of throw pillows for that hygge vibe.
2. Minimalist Montessori Toy Shelf
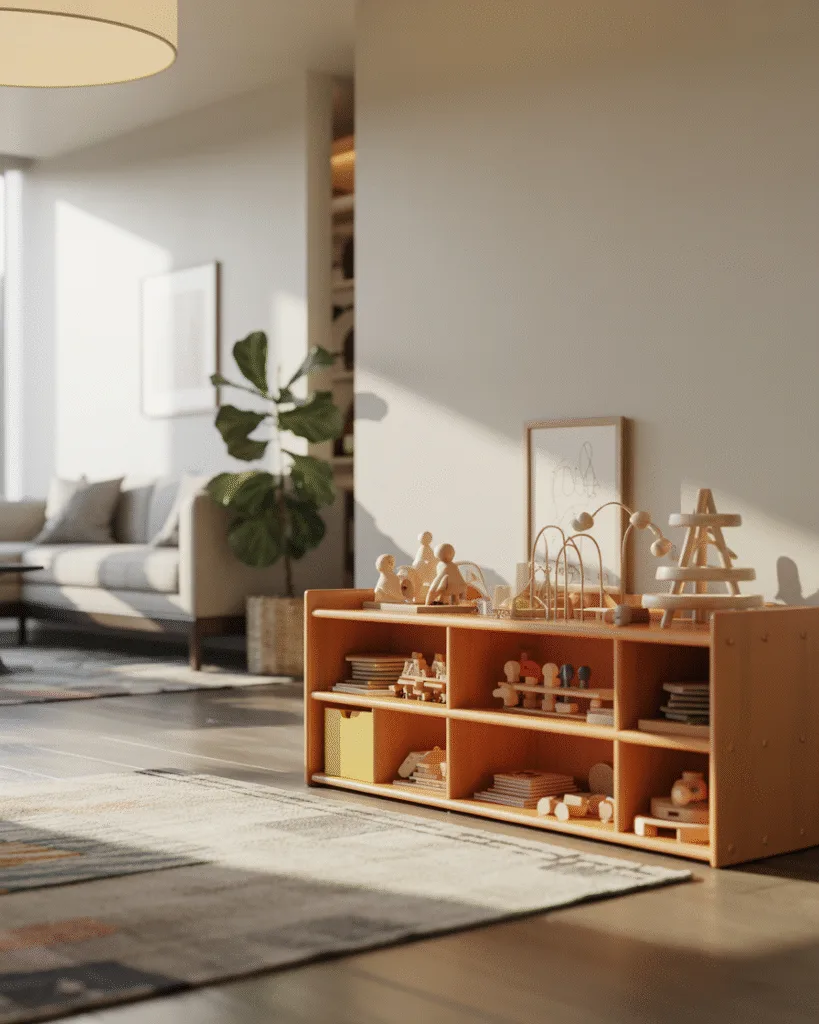
If you’re like me and love things looking organized (even when chaos reigns), a Montessori-style toy shelf is a total win.
The beauty here is in accessibility and simplicity. Everything’s at your kid’s level, making it easy for them to grab, play, and put things back.
What you’ll need:
- A low open shelf (preferably wood or white finish)
- A rotation of 6–8 toys displayed with plenty of space
- Natural materials like wooden toys or soft plushies
- Labeled baskets or trays for grouping toys
Key Point: Only keep a few toys out at a time. This avoids overstimulation and helps them focus better.
3. Art Station with Chalkboard Wall
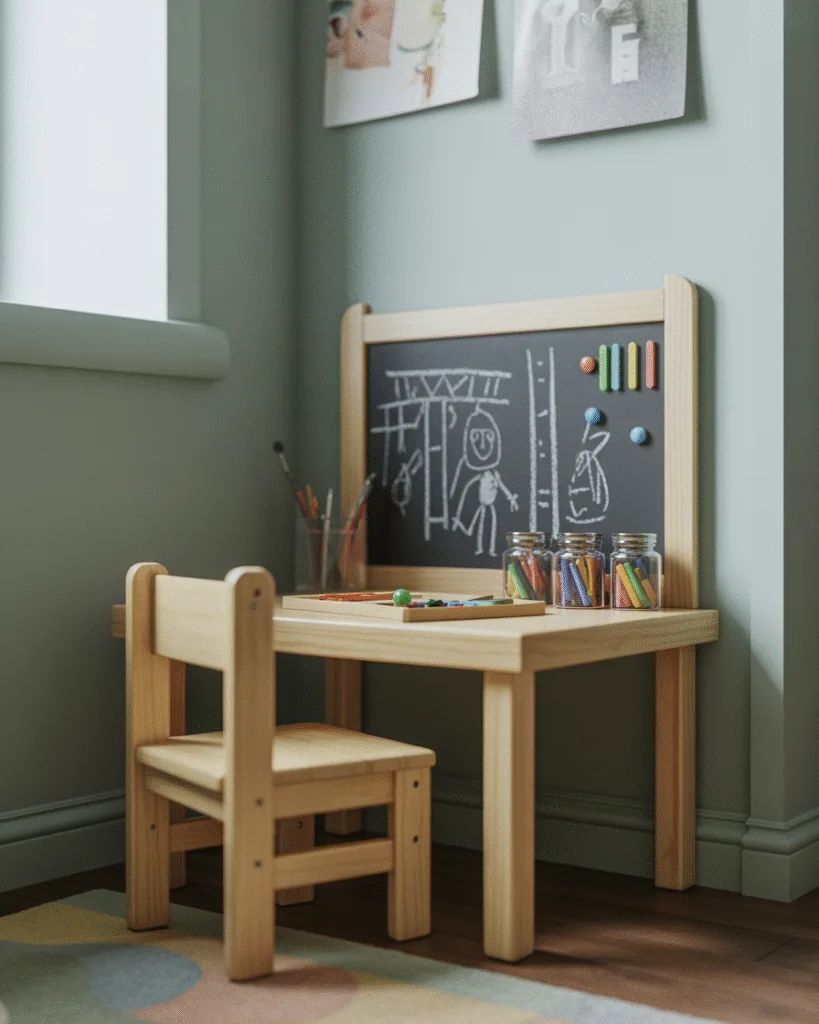
Okay, this one gets messy, but it’s the best kind of messy. An art station with a chalkboard wall lets your kid’s creativity shine (without wrecking your actual walls).
Here’s what I did:
- Painted one small section with chalkboard paint
- Added a wall-mounted paper roll for endless coloring
- Used clear bins to sort markers, paints, and crayons
- Hung a drying string with clips to display their masterpieces
Bonus Tip: Add a little step stool and an apron hook for that “mini studio” vibe.
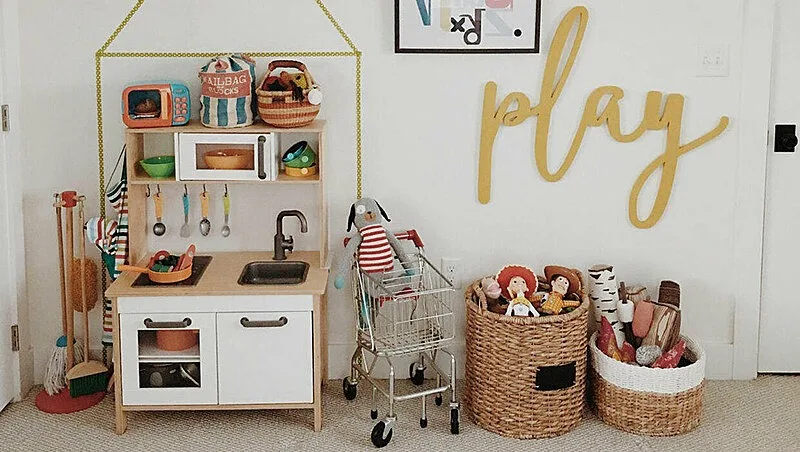
4. Mini Kitchen Playset Corner
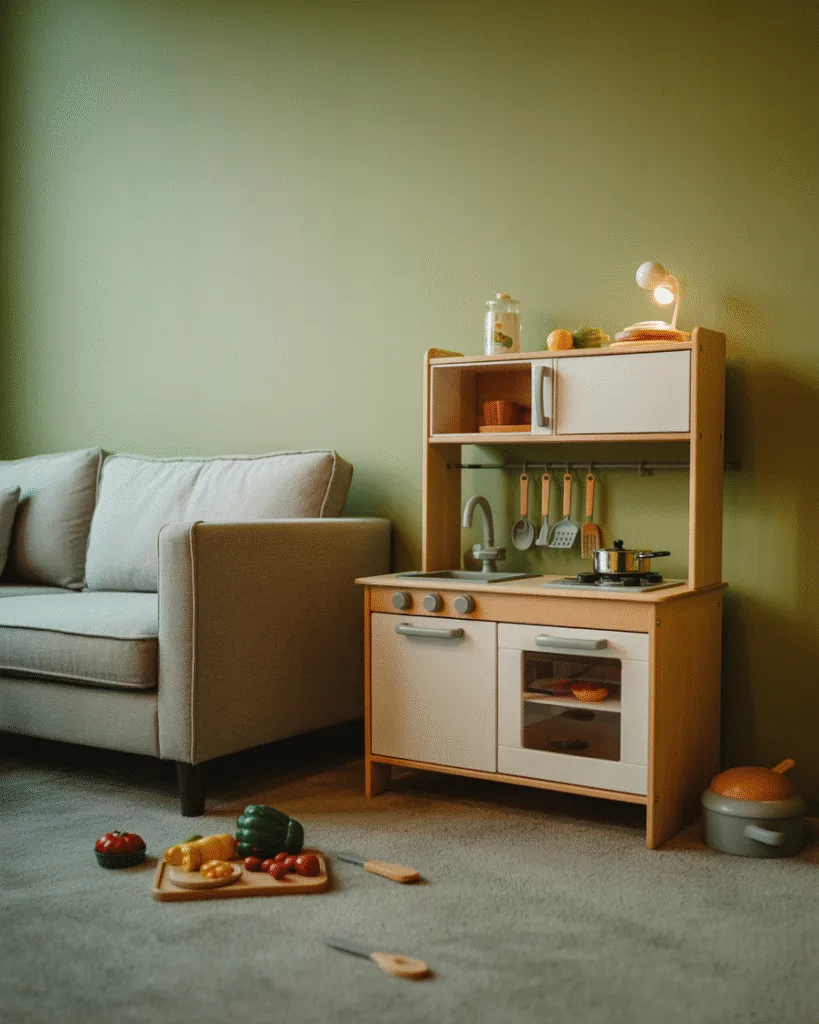
If you’ve ever watched a toddler “cook,” you know how adorable this can be.
A mini kitchen play corner adds a whole world of roleplay, plus, it encourages pretend cooking, cleaning, and even restaurant ownership (according to my kid!).
Set it up with:
- A wooden kitchen playset with oven, sink, and storage
- Toy utensils, pots, pans, and play food
- A tiny menu board or chalk sign
- Small storage baskets for ingredients
Pro Tip: I added a tiny dish towel and sponge set, and my little chef now insists on “cleaning” after every session!
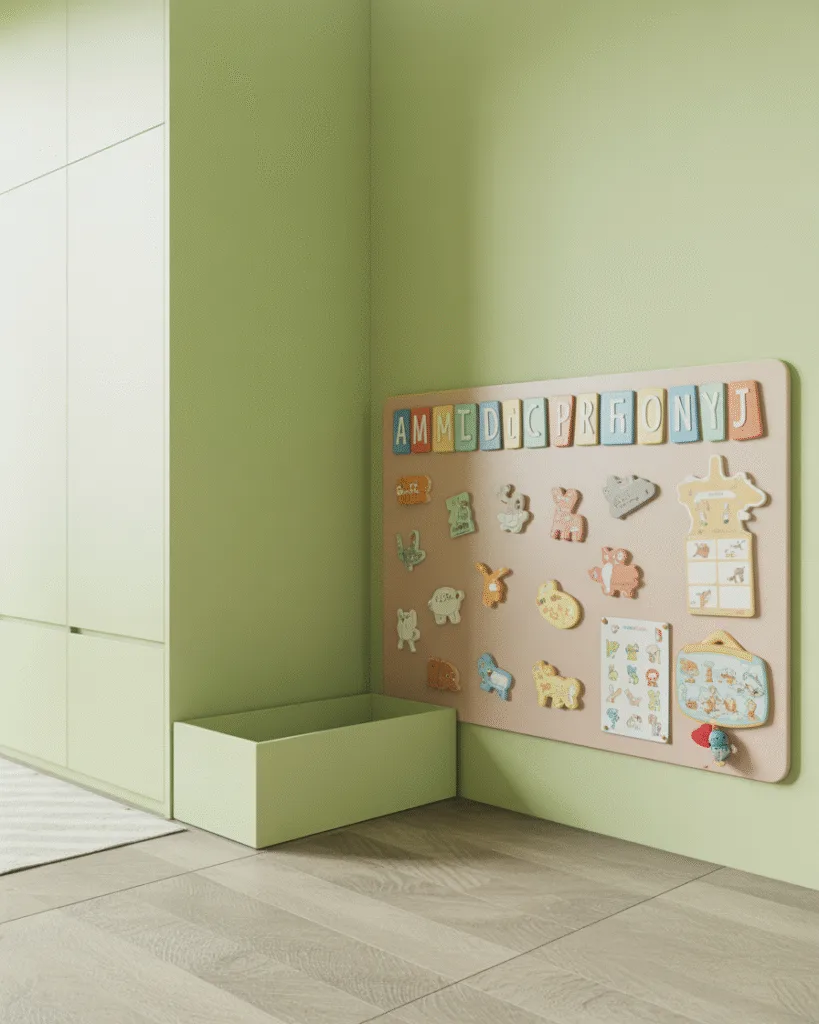
5. Wall-Mounted Activity Board
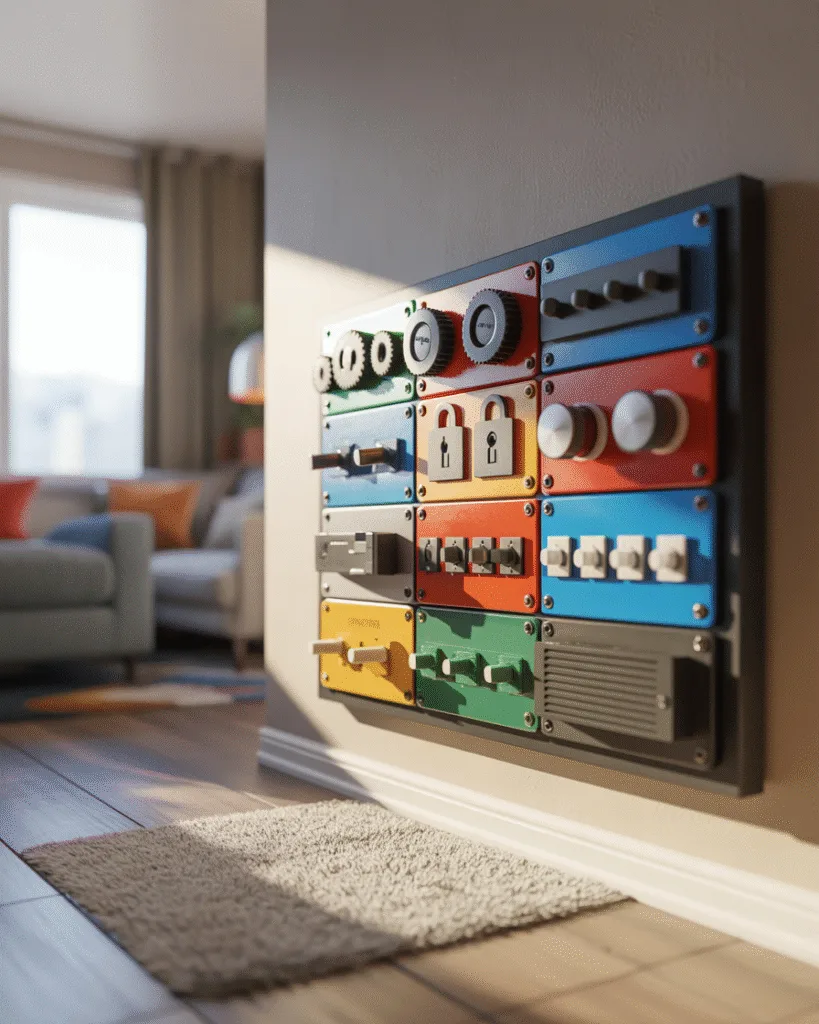
This one’s super handy when space is tight. A wall-mounted activity board packs in loads of sensory and learning elements, without taking up any floor space.
Think of it like a fidget toy, on a wall!
What to include:
- Zippers, buttons, and latches
- Gears, knobs, and spinning wheels
- Velcro patches, soft textures, bells, and mirrors
- Alphabet or number tiles for a learning boost
Design Tip: Mount it at their height. Keep the color scheme simple or theme it (like space, farm, or forest).
6. Cozy Reading and Puzzle Corner
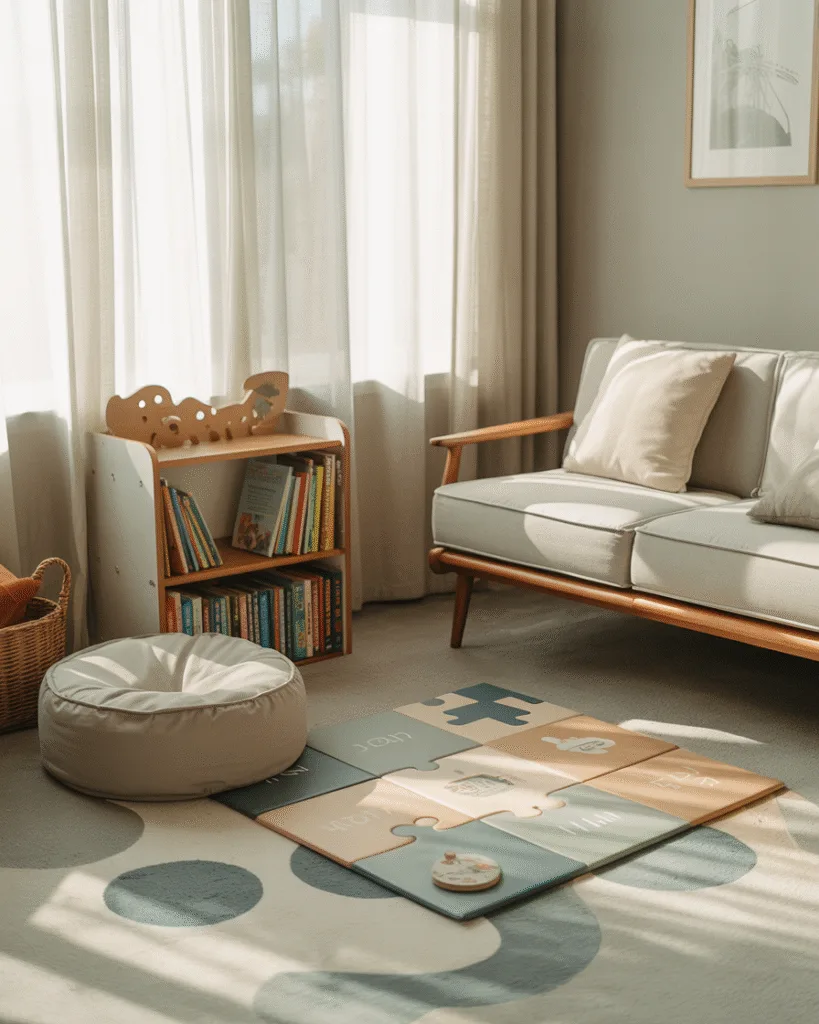
If your kid loves books or puzzles, this is the coziest little haven you can create. I made ours in a quiet corner next to a window, it’s now the go-to calm zone after school.
Here’s what helps:
- A mini armchair, bean bag, or plush floor pillow
- A small bookshelf or wall-mounted ledge
- A cute lamp or string lights for ambiance
- Storage baskets for puzzles and books
Pro Tip: Keep a blanket nearby, it’s amazing how a little softness turns reading time into cuddle time.
7. Lego Building Zone with Storage
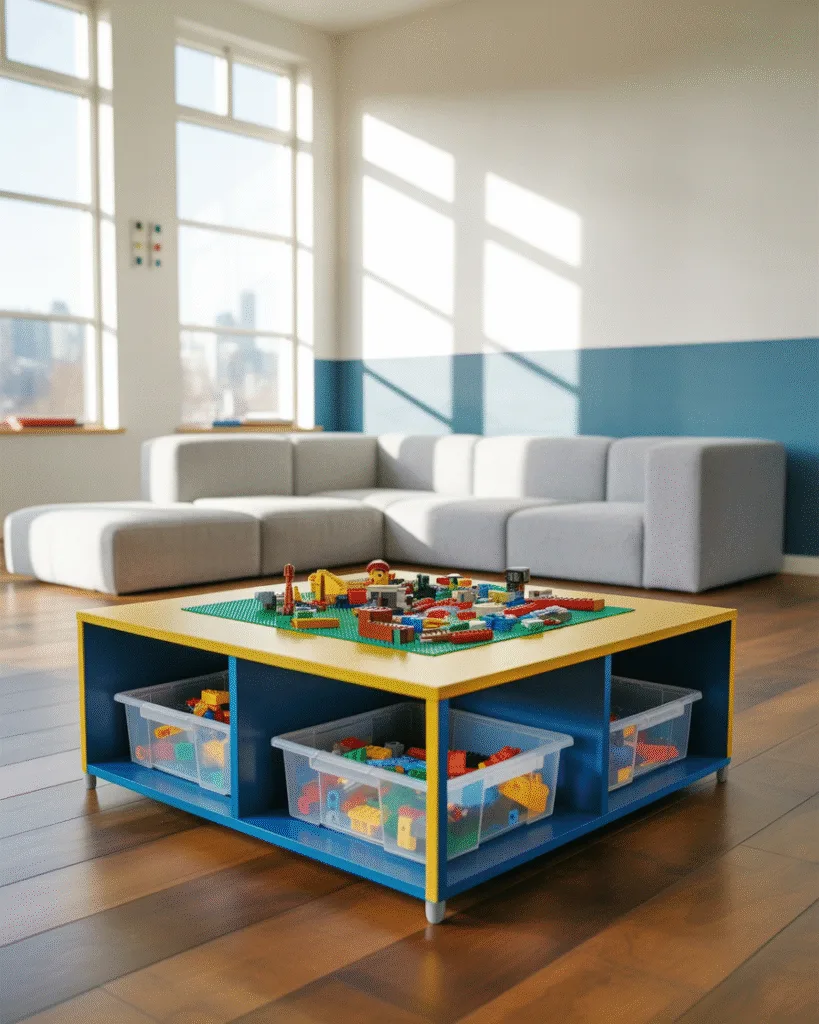
Lego is brilliant… until it’s scattered everywhere. So, let’s contain the chaos and create a Lego station that’s both fun and functional.
Here’s how I made it work:
- A low table with a Lego baseplate top
- Drawer units or cube shelves underneath for sorting pieces
- Clear bins labeled by color or type (yes, this changed my life)
- Display space for “finished builds”
Design Tip: Mount a magnetic strip or pegboard nearby to hang instructions and mini-figures!
8. Interactive Floor Game Area
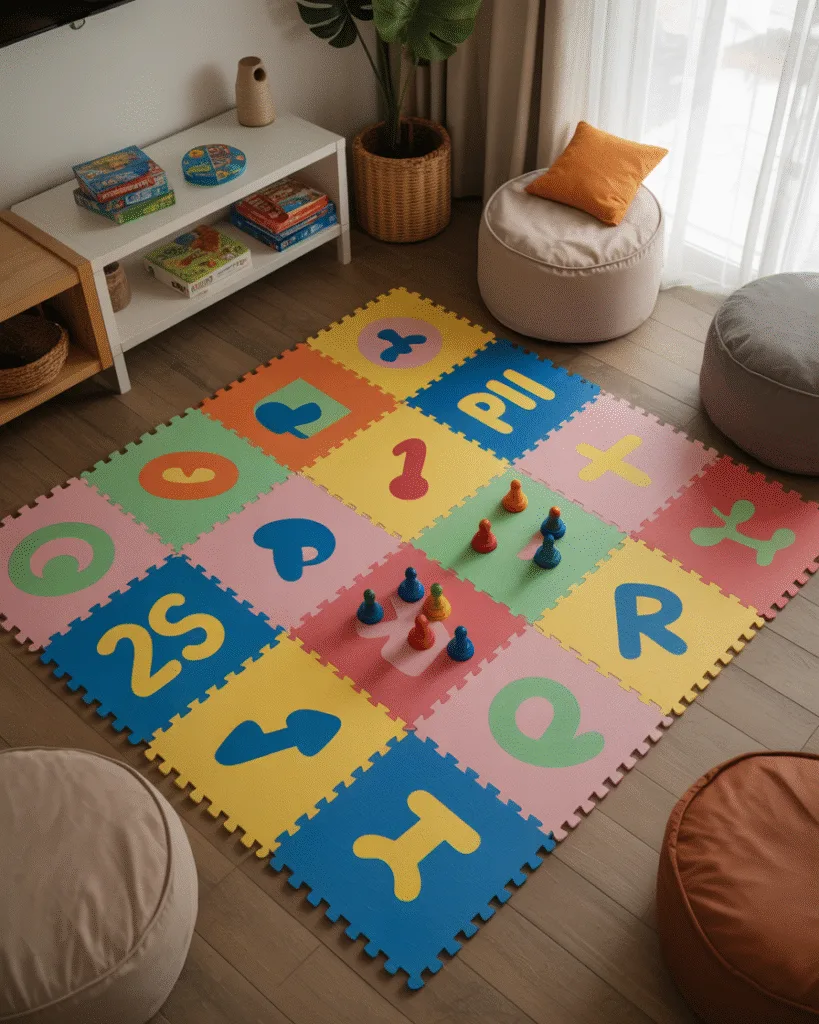
This one’s all about movement. If your little one’s got energy to burn (I mean, whose doesn’t?), an interactive floor game area is genius.
Create a space for:
- Hopscotch decals or foam mats
- Mini basketball hoop or ring toss
- A yoga mat for stretching or movement games
- Soft dice or bean bags for counting and throwing
Key Features:
- Use interlocking foam tiles for safety
- Keep it open and clutter-free
- Add a mirror to help them see their moves, it boosts coordination!
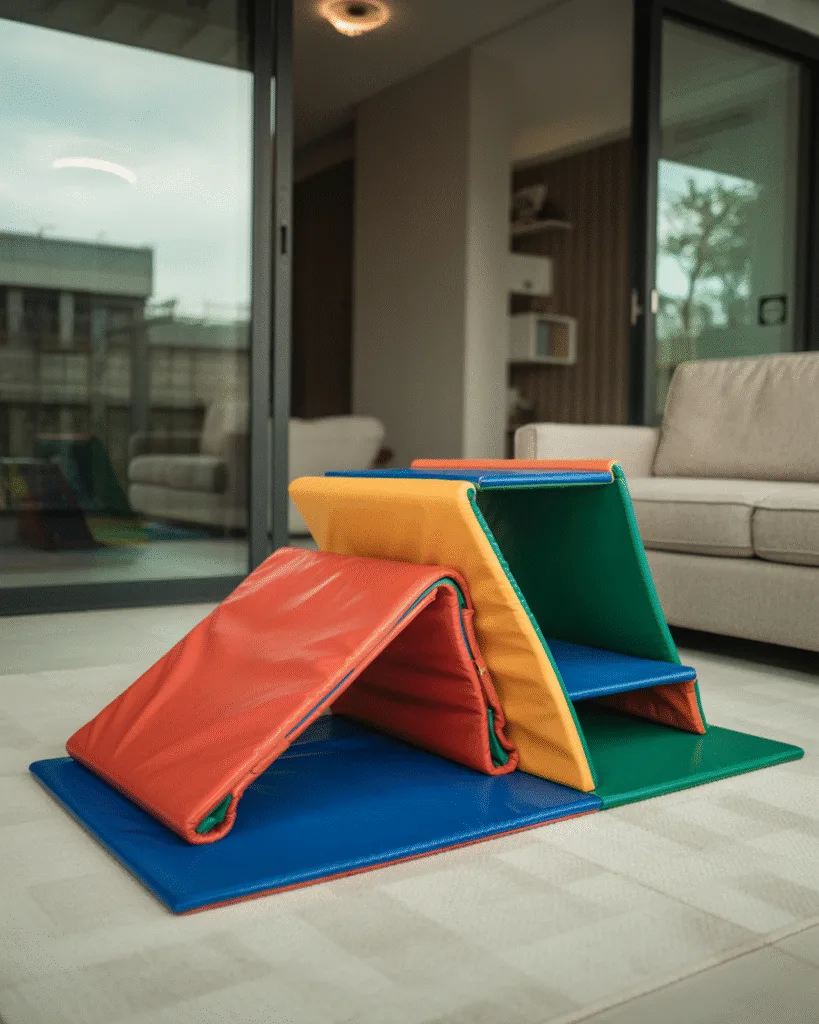
9. Soft Climbing and Slide Area
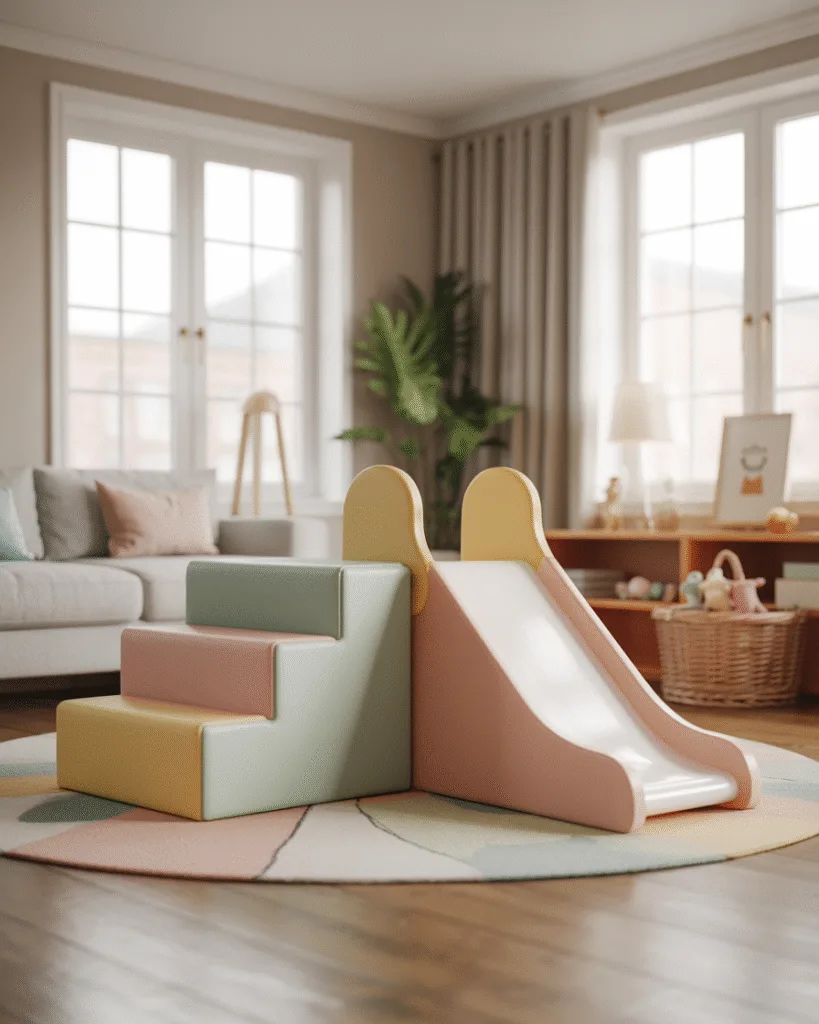
Got a little adventurer? A soft climbing corner with a slide can turn your home into a mini indoor playground.
I added this when we couldn’t go to the park for weeks, and it was a total game changer.
Essentials include:
- A soft foam slide and steps
- Climbing blocks or mini soft gym
- Mats underneath for safety and cushioning
- Optional: Add a tunnel or mini tent for hide-and-seek fun!
Safety Tip: Keep this area away from hard furniture. And always supervise when they’re little climbers.
10. Train Table Play Setup
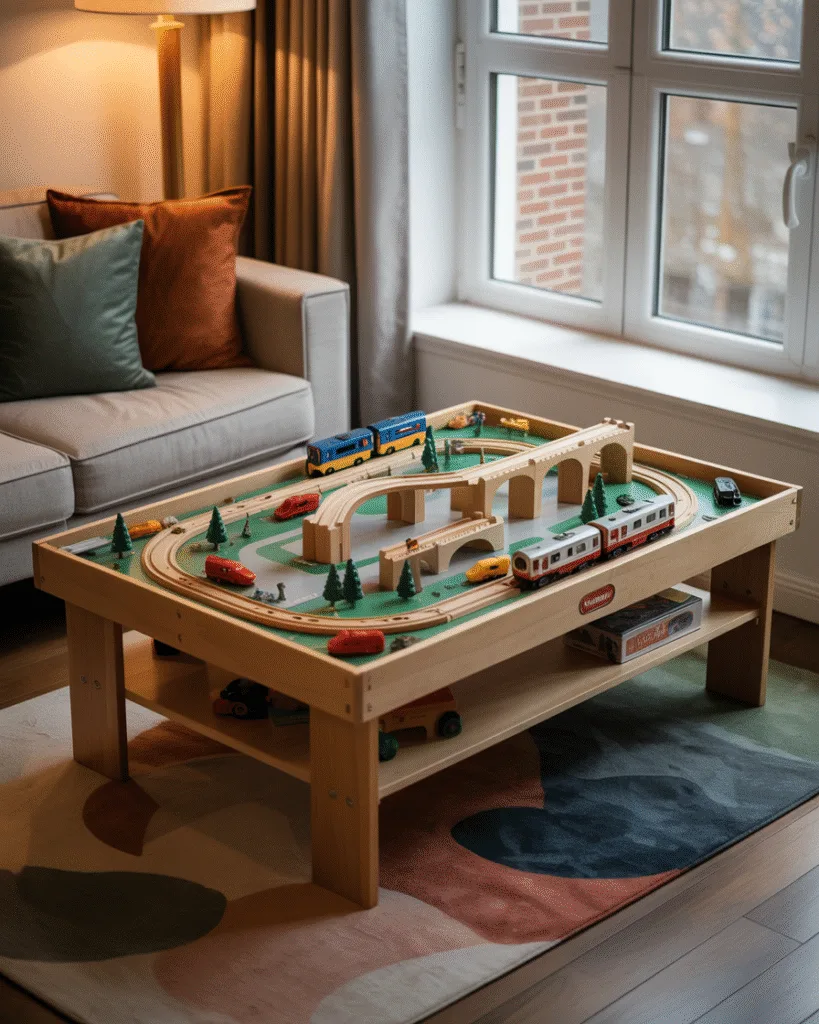
I’m a sucker for anything that keeps little hands and minds busy, and a train table is an absolute winner.
I set one up for my nephew in our family room and, no exaggeration, he spent hours making “Choo-choo mountains” and “traffic jams.” 😆
Here’s how to make it awesome:
- Choose a low-profile train table, so it’s safe and accessible for toddlers.
- Look for one with built-in storage underneath, trust me, you’ll thank yourself.
- Keep a small basket nearby for trains, cars, and tracks.
- Use removable road tape on the surface to customize the layout!
Pro Tip: Add a mini traffic light or signs for a fun learning element.
11. Under-the-Stairs Hideaway Nook

Ohhh, this one’s a favorite. If you’ve got that little triangular space under the stairs, please don’t waste it on random storage.
Turn it into a magical hideaway instead!
I helped a friend redo hers with just:
- A bean bag chair
- Some twinkly fairy lights
- A rug and a few soft pillows
- And a low bookshelf filled with picture books
Now her kids call it their “dragon cave.” 🐉
Design Tips:
- Use peel-and-stick wallpaper to create a cozy vibe.
- Add a small curtain to give it a “secret fort” feel.
- Include a battery-operated lamp or motion light for safety.
12. Sensory Play Table Zone
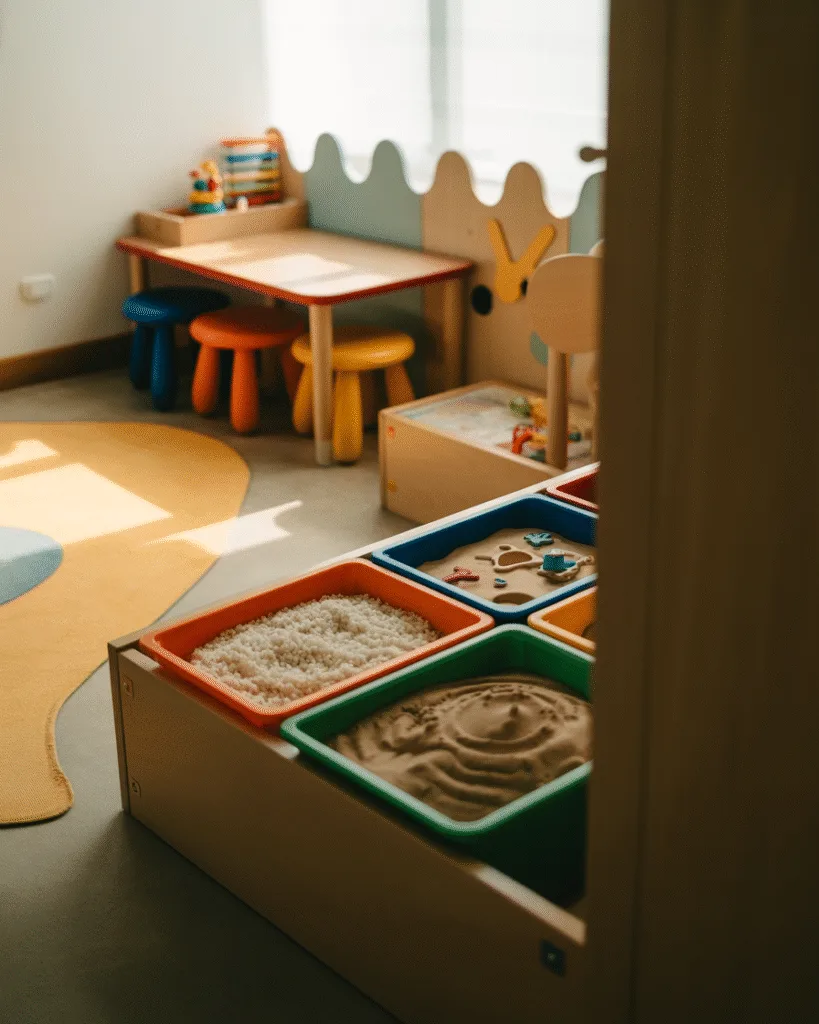
If you’ve got a kid who loves to squish, pour, and scoop, this one’s for you.
A sensory table doesn’t have to be fancy. Mine? It’s a repurposed IKEA table with a couple of bins stuck inside. Instant tactile paradise!
Things to include:
- Rice, beans, kinetic sand, or water beads
- Measuring cups, spoons, and scoops
- Toy animals or mini trucks for themed play
- A wipeable mat underneath (you’ll need it 😂)
Why it’s great:
- Promotes fine motor skills
- Encourages independent exploration
- Helps with sensory regulation
Rotate materials every week to keep it fresh!
13. Interactive Musical Wall
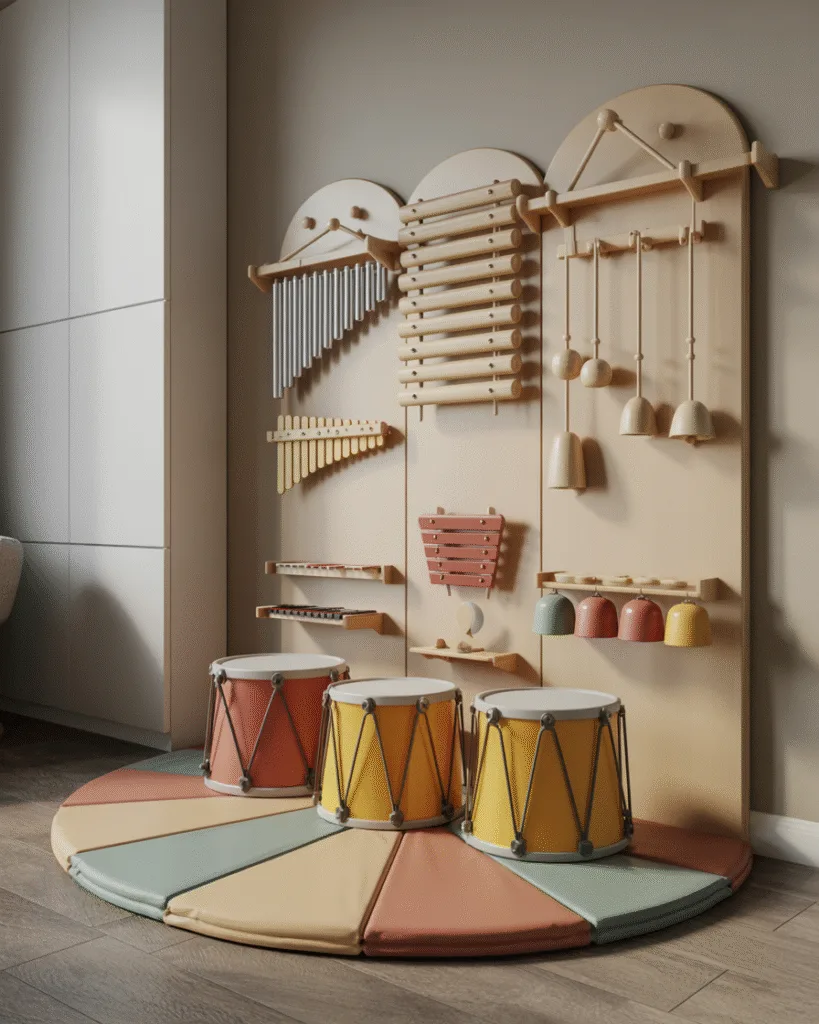
Have a little drummer in your life? (Or, like me, a tiny noise enthusiast?) 😅 Give them their own music wall.
I used some stick-on hooks and mounted:
- Mini tambourines
- Jingle bells
- A triangle
- And a few pots and pans (yes, really)
Setup Ideas:
- Use command hooks or pegboards to hang instruments.
- Label each one for a fun learning element.
- Add a chalkboard section so they can write “concert setlists.”
Biggest win: No more banging on your actual kitchenware. 🎶
14. Storytime Tent with Night Lights
This might be my coziest pick.
Imagine this, a little tent filled with books, soft cushions, and glowing string lights. That’s not just a reading corner, that’s an experience.
Here’s what I used:
- A simple play tent (or DIY one with sheets and PVC)
- A plush rug or foam tiles
- LED night lights or a star projector
- A book basket or mini shelf
Bonus tip: Keep a little flashlight inside for flashlight reading sessions. Kids love it!
15. Puppet Theater Nook
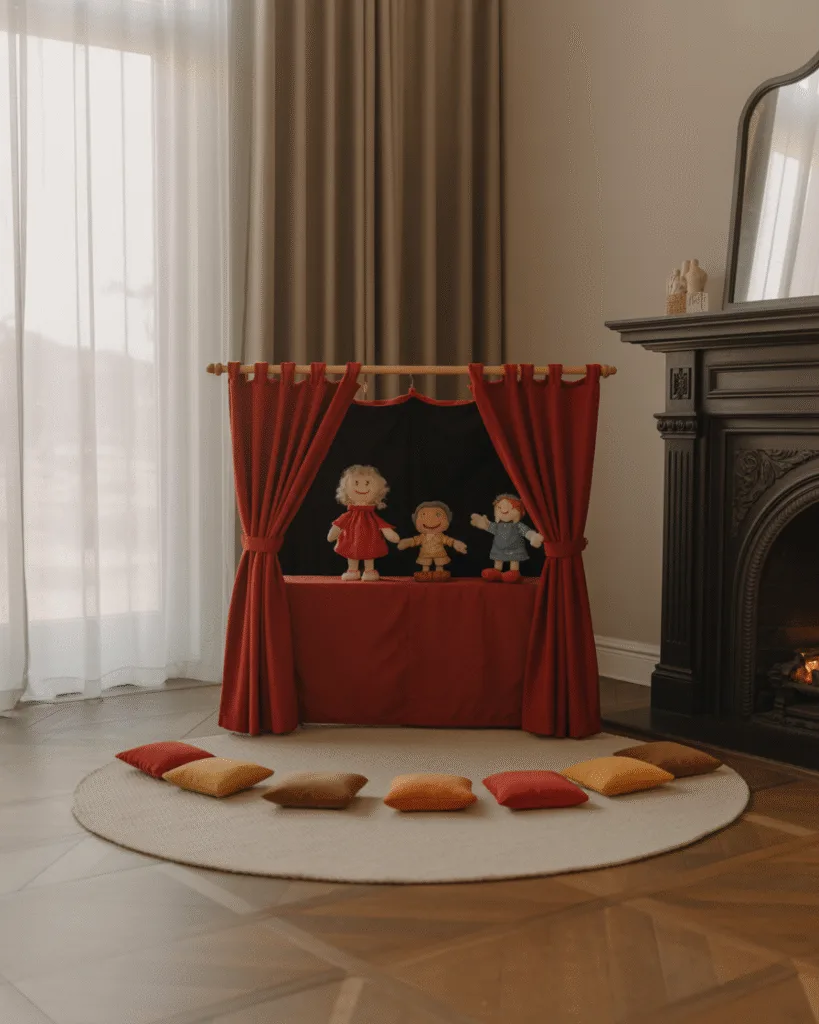
We turned the side of our bookshelf into a puppet theater once, complete with a red curtain and all.
And let me tell you, the performances were… chaotic but hilarious. 😂
You can use:
- A fold-out cardboard frame
- A curtain rod and a couple of cloth panels
- Hand puppets (or socks if you’re in a pinch!)
Why it rocks:
- Encourages creativity and storytelling
- Builds confidence through roleplay
- Lets siblings (or you!) get in on the fun
Extra fun: Add a clipboard nearby to jot down showtimes!
16. Foldable Gym Mat Play Zone
Perfect for high-energy kids (which is all of them, right?).
I added a foldable gym mat next to our playroom bookshelf and now it’s the go-to spot for somersaults, yoga poses, and ninja moves.
Get started with:
- A foldable tumbling mat (look for one that’s wipeable!)
- Stackable cushions or foam blocks
- Maybe a mini climbing frame if space allows
Safety Tips:
- Always keep the area clear of sharp edges.
- Consider placing it near a wall for back support.
- Supervise when needed, especially for flips and jumps.
It’s basically their mini indoor playground.
17. Creative Dress-Up Corner
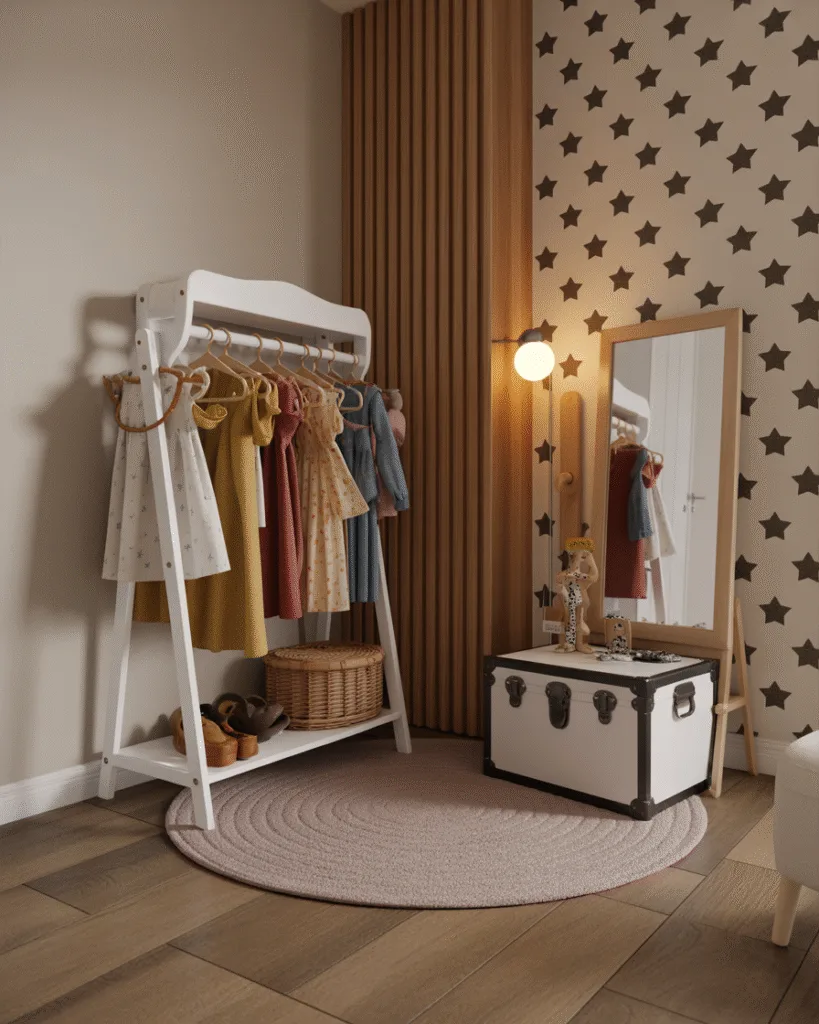
We all have that one kid who lives in a princess dress or superhero cape 24/7.
So why not give them a proper space to own it?
Here’s what worked for us:
- A clothes rack at kid-height
- Bins for accessories (hats, scarves, tiaras)
- A mirror at their level
- A few hooks on the wall for daily faves
Key Points:
- Label the bins for easy clean-up.
- Rotate costumes based on season or interests.
- Add a “Runway” rug for fashion shows. 🎤
This one’s especially great for encouraging imaginative play.
18. Magnet Board Learning Wall
Want a fun, screen-free way to teach letters, numbers, or storytelling?
This one’s gold.
We mounted a big magnetic whiteboard on the wall (you can also use a cookie sheet if you’re low on space), and then stocked up on:
- Magnetic letters & numbers
- Animal or shape magnets
- Magnet puzzles
- Dry-erase markers, for doodling between lessons
Why it works:
- Combines learning and play seamlessly
- Easy to switch up themes (alphabet day, safari day, etc.)
- Great for both solo play and parent-kid bonding time
Bonus: It doubles as a chore chart or weekly planner if you want to sneak in some organization!
Mistakes to Avoid When Setting Up a Play Corner
Let’s be real, we’ve all tried and failed at organizing kids’ play stuff at some point. So here’s what not to do:
- Overcrowding the area with too many toys or furniture
- Choosing noisy, flashy items that overstimulate
- Skipping storage solutions, seriously, baskets are lifesavers!
- Ignoring lighting or comfort (even play zones need good vibes)
- Using fragile decor or items that aren’t kid-friendly
Stick to thoughtful, intentional choices and your space will work with you, not against you.
FAQ: All Your Play Corner Questions, Answered
How much space do I need to create a kids’ play corner?
Not much at all! Even a 3’x3’ nook can become a magical space with the right setup. Use walls and vertical storage to maximize smaller areas.
Can I mix multiple play corner ideas in one room?
Absolutely. In fact, zoning out different corners in a single room is a smart way to encourage different kinds of play, just make sure each area has its own vibe and purpose.
What age are these ideas best for?
Most of these setups work for toddlers to early elementary age. You can easily tweak elements as they grow (e.g., swap a teepee for a beanbag chair, or upgrade a toy shelf with books).
How do I keep the play corner from becoming a mess?
The secret: clear storage + toy rotation. Keep only a few items out and rotate weekly. Label bins so kids learn to clean up themselves.
Are play corners safe for active kids?
Yes, as long as you use soft materials, rounded edges, and anchor heavy furniture to the wall. For climbers, add padding and supervise accordingly.
Wrapping It All Up (Final Thoughts)
There’s something magical about a kid having their very own corner to play, dream, and just be little. Whether it’s a teepee nook, a chalkboard wall, or a Lego zone, the goal is simple: create a space that feels special and works for your family.
Start small, make it personal, and don’t stress the mess, it’s all part of the fun. 💛