Hey there, friend!
If you’ve been staring at your backyard or garden wondering how to zhuzh it up without maxing out your credit card, you’re in the right place.
Walkways can totally change the look and feel of your outdoor space. And guess what? You don’t need to be a pro landscaper or drop a fortune at the home improvement store to make it happen.
I’ve rounded up 17 cheap walkway DIY ideas that are super doable, wallet-friendly, and honestly… a little bit fun.
Ready to get your hands a bit dirty? Let’s Dive in
Why Walkways Matter More Than You Think
Okay, hear me out: a good walkway isn’t just a path. It’s like the punctuation in your garden sentence (yeah, I said that). It guides the eye, keeps your shoes mud-free, and gives your yard a put-together, intentional vibe.
Here’s why I swear by them:
- Instant curb appeal – even a simple walkway adds a structured look.
- Functionality – no more stepping in puddles or walking on wet grass.
- DIY joy – they’re surprisingly satisfying to make.
- Budget-friendly transformation – big style for small bucks.
Let’s dive into the good stuff.
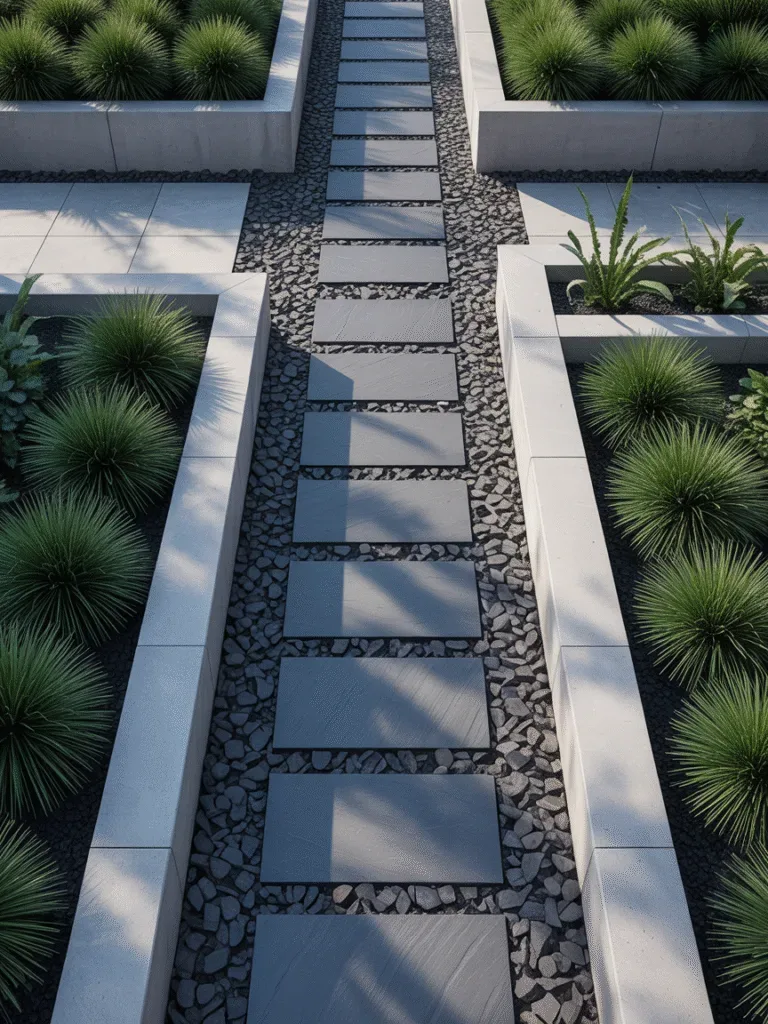
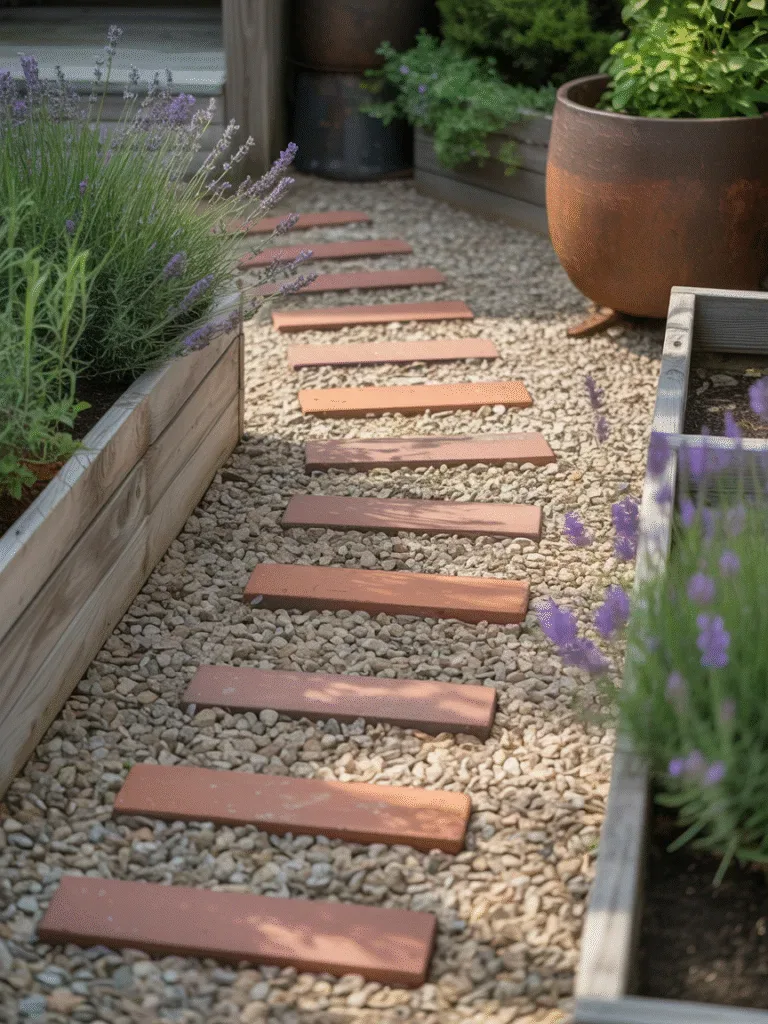
1. Gravel and Wood Frame Walkway

This one’s a personal favorite because it looks great and is super easy to maintain.
You build a simple wooden frame using 2x4s or reclaimed boards, then fill it up with gravel or crushed stone.
It’s inexpensive, drains water really well, and gives your garden a neat, structured look without looking too fussy.
I made one in a day, and it completely transformed the space!
Design Tips:
- Paint or stain the wood for extra charm.
- Use landscape fabric underneath to block weeds.
What you’ll need:
- 2×4 wood planks
- Gravel or crushed stone
- Landscape fabric
- Screws and drill
Best part: It drains water like a champ.
2. Concrete Stepping Stones
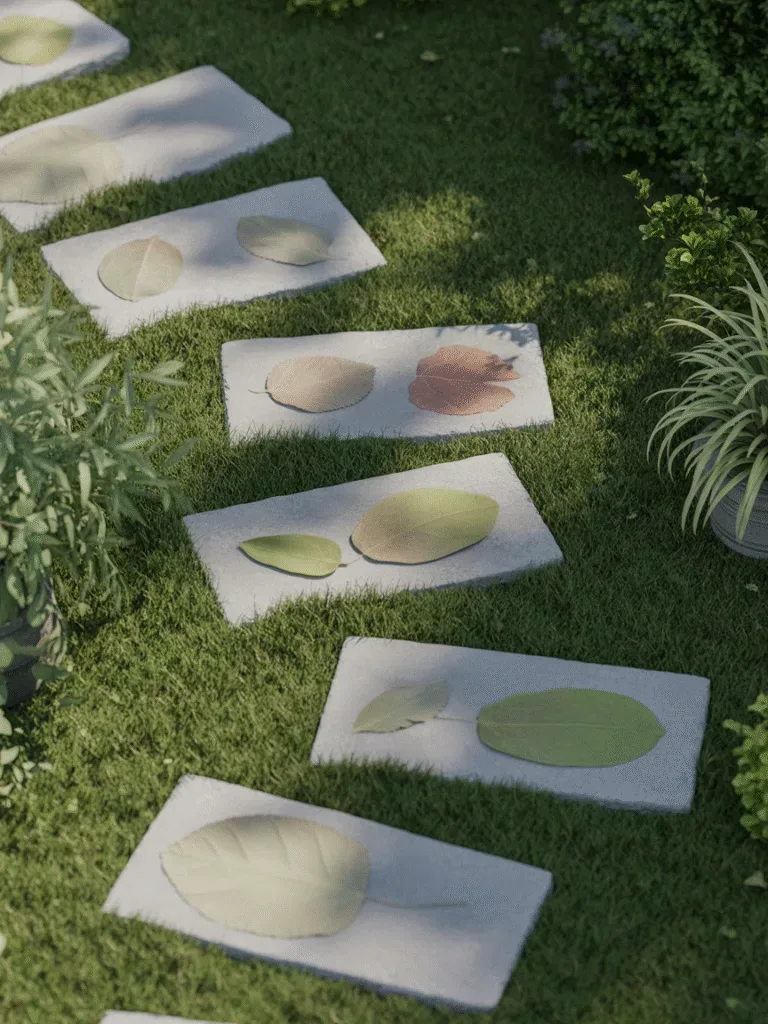
Concrete gets a bad rap, but when you DIY it into stepping stones, it’s anything but boring.
Pour quick-set concrete into molds—store-bought or homemade—and let them harden. Add personal touches like leaves or handprints before it sets.
You can even tint the concrete to match your outdoor vibe. They’re sturdy, stylish, and you can make them in batches whenever you’ve got time.
Here’s the trick:
- Use molds or DIY a mold with old baking trays or boxes.
- Pour in your concrete mix, smooth it out, and let it cure.
Personal Twist:
- Add leaves, shells, or even handprints for a personal touch.
Materials Needed:
- Quick-set concrete
- Molds (real ones or DIY)
- Cooking spray (to release the mold)
Super tip: You can color the concrete with powdered tints. It’s cheap and adds personality!
3. Brick-Style Path With Recycled Pavers
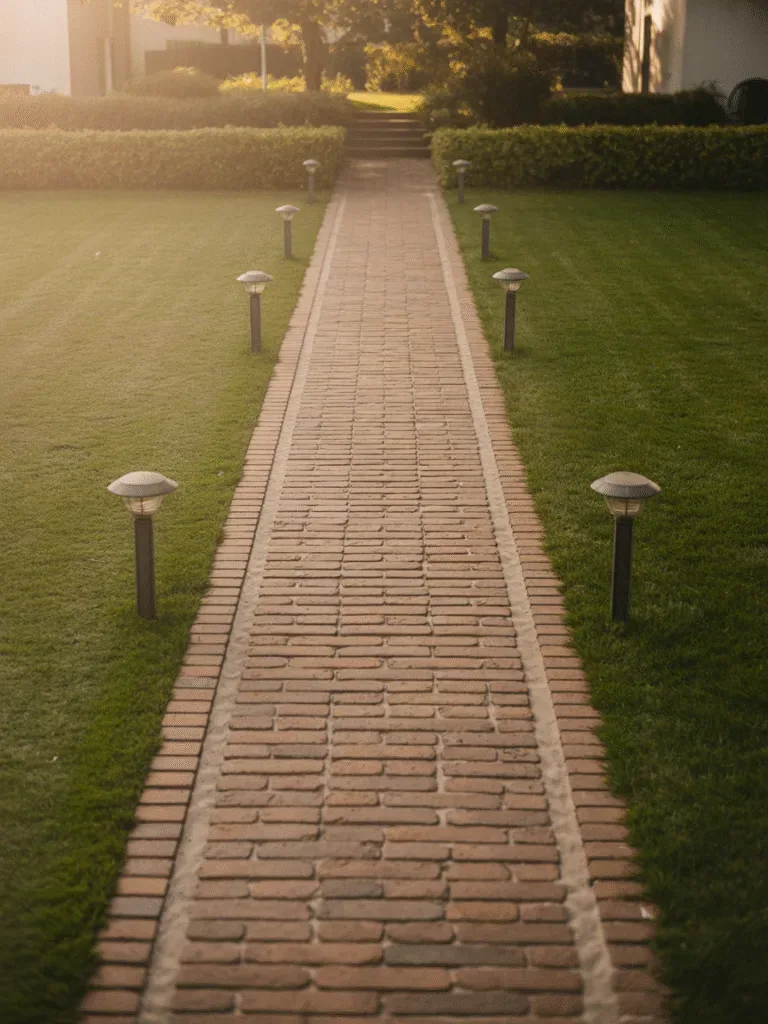
This one is not only budget-friendly but also eco-friendly. You can find old bricks or leftover pavers online or from construction sites.
Lay them down in a herringbone or running bond pattern on a bed of sand, and you’ve got yourself a classic-looking path.
It’s a bit of work upfront, but the result is sturdy and timeless.
I scored a batch of old red bricks once and made a charming little garden path that still gets compliments.
How to lay it down:
- Dig a shallow trench
- Line it with sand or crushed rock
- Lay the bricks in any pattern you love
Fun Patterns to Try:
- Herringbone
- Running bond
- Basketweave
Top Tip: Tap the bricks with a rubber mallet to secure them. That thud is weirdly satisfying.
4. Mulch and Log Slice Path
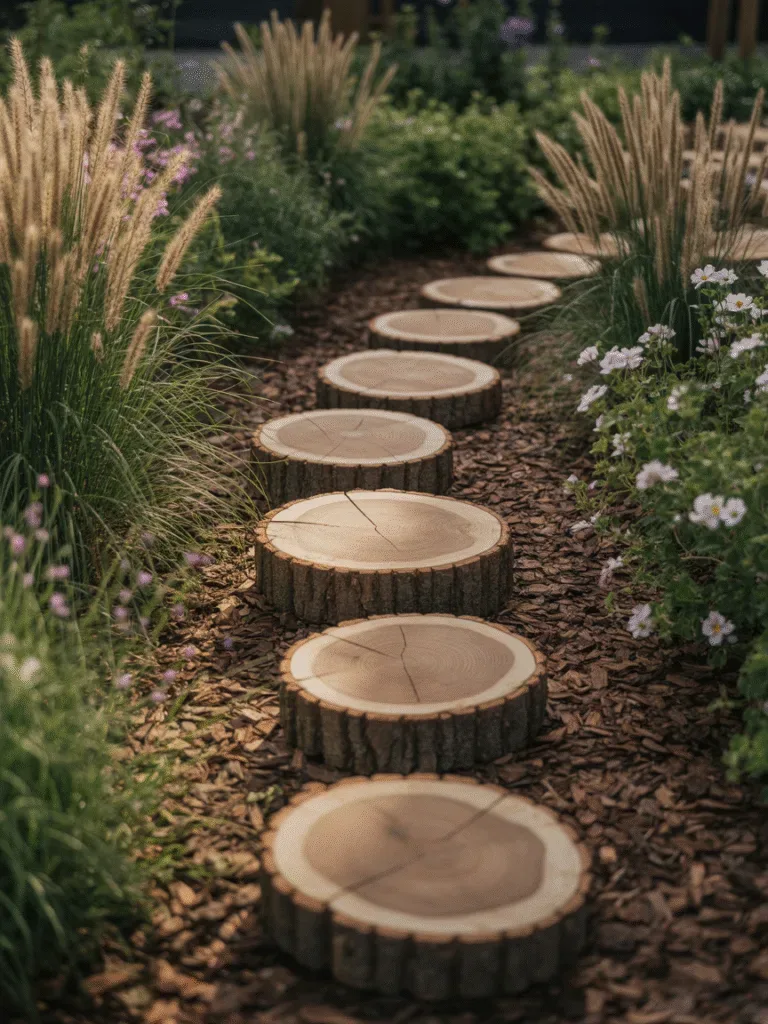
There’s something magical about walking through a path made of log slices. It looks like a fairy garden came to life. If you’ve got access to tree logs or thick branches, cut them into slices and lay them over a bed of mulch or gravel. Seal them to prevent rotting, and you’ve got a whimsical, budget-friendly path that’s perfect for garden trails.
What to do:
- Cut log slices about 2 inches thick
- Lay them down in mulch or gravel
Why I love it:
- So natural-looking and blends into a garden like magic.
- You can seal the wood slices with polyurethane to make them last longer.
What you’ll need:
- Wood slices (dried and cut evenly)
- Mulch or gravel
- Sealant (optional)
5. Pallet Wood Walkway

Pallet wood is such a DIY treasure. Not only is it free or super cheap, but it also gives off a cozy, rustic feel.
Break down a pallet, sand the planks smooth, and lay them over a gravel base.
Treat the wood with a water-resistant stain, and voilà—your very own wooden path that didn’t cost a dime (except maybe a little sweat).
I once made a pallet path that turned a weedy corner of my yard into a Pinterest-worthy nook.
Here’s what to do:
- Break down the pallet boards
- Sand them (splinters = no fun)
- Lay them over a flat gravel base
Quick notes:
- Space them slightly to allow for drainage
- Treat them with weatherproof stain
Pro tip: Add solar lights along the sides for cozy nighttime vibes.
6. Pebble Mosaic Path
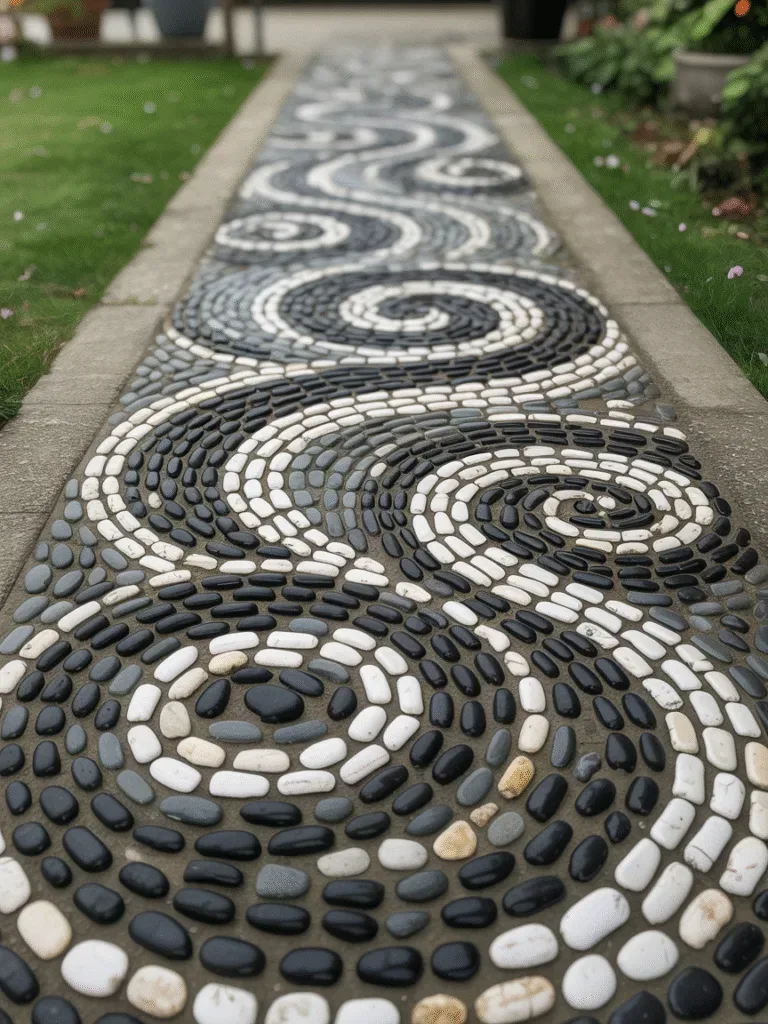
Feeling artsy? This one lets your creative side shine. Arrange smooth pebbles or river rocks in a fun pattern—spirals, sunbursts, waves—inside a shallow concrete base.
It’s like building outdoor art you can walk on. Perfect for accent areas in the yard where you want to show off a little personality.
I once made a small spiral by my birdbath, and it’s still my favorite spot to sip morning coffee.
The idea:
- Create fun patterns with smooth river rocks or pebbles in a shallow set concrete base
Perfect for:
- Small sections or transition areas in your yard
- Around water features or zen garden spots
How to rock it:
- Use a shallow trench
- Pour concrete base
- Set your pebbles in your chosen pattern
Bonus: It’s a conversation starter every time someone visits.
7. Crushed Shell Path
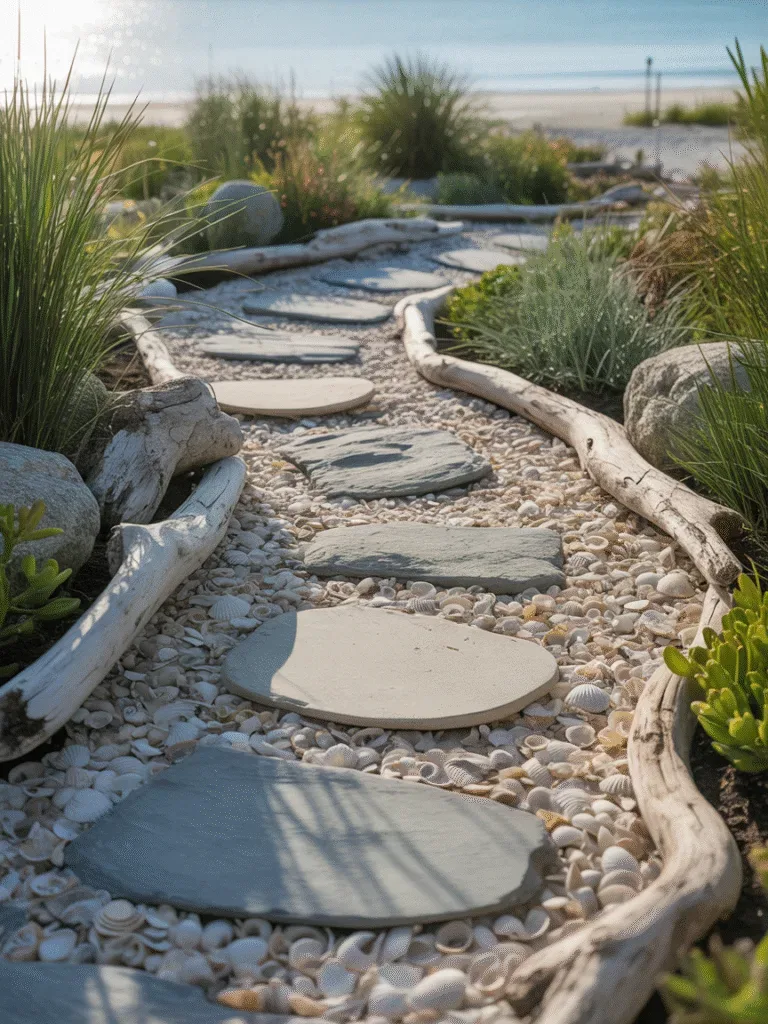
Live near the coast or can get your hands on some crushed shells? They make a surprisingly gorgeous walkway material.
Spread them over landscape fabric inside a framed path, and you’ll get a light, beachy vibe that feels clean and bright.
Shells compact over time, making a sturdy surface that’s also great at draining water. Plus, walking on shells has the most satisfying crunch.
What it looks like:
- Crushed seashells instead of gravel
- Gives that breezy, beachy vibe
Why it works:
- Shells compact nicely over time
- Great drainage
- Whiteness brightens the space
Must-haves:
- Crushed shells (get them in bulk)
- Landscape fabric
- Border to contain them
8. Recycled Tile Mosaic Walkway
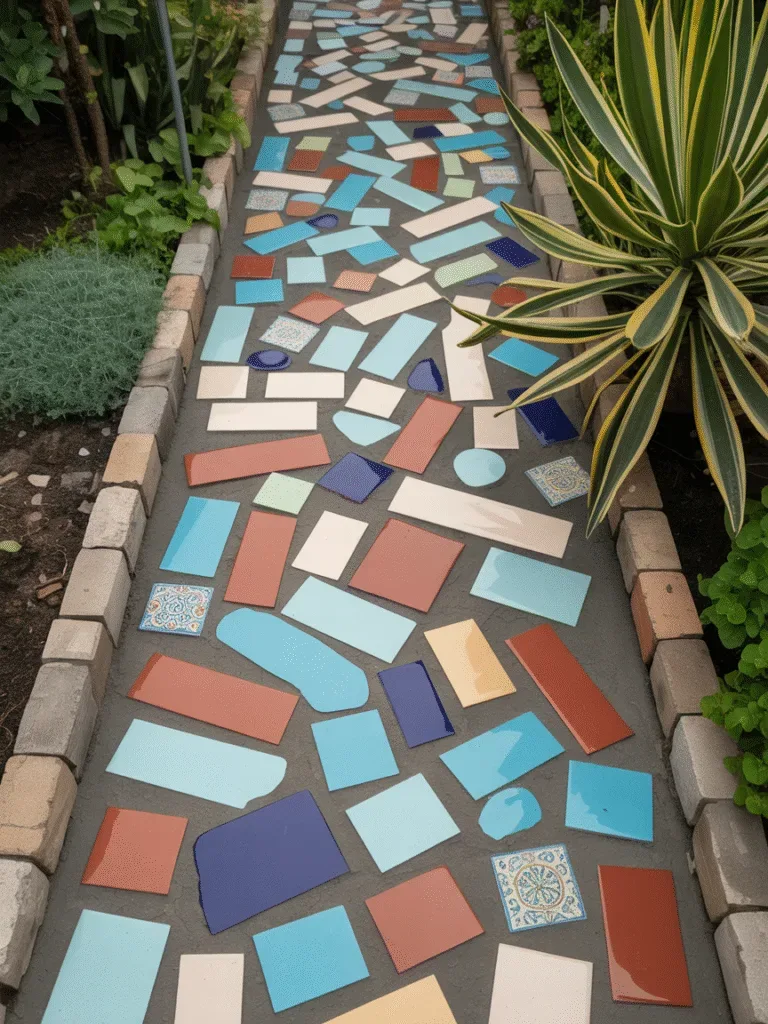
If you’ve got broken tiles lying around—or even plates you no longer use—this is a great way to upcycle them into a one-of-a-kind walkway.
Set colorful pieces in a concrete or mortar base like a puzzle. It’s bold, artsy, and perfect for patios or leading to a garden feature.
I used leftover kitchen backsplash tiles and turned them into a mosaic walkway that gets compliments all the time.
Here’s what I did:
- Broke the tiles into funky pieces
- Set them into a concrete base like a jigsaw puzzle
Design Bonus:
- You can get super creative with colors and shapes
Key supplies:
- Leftover tiles
- Concrete or mortar base
- Trowel and gloves
Hot tip: Seal it well so it lasts through all seasons.
9. Grass and Stone Combo Path
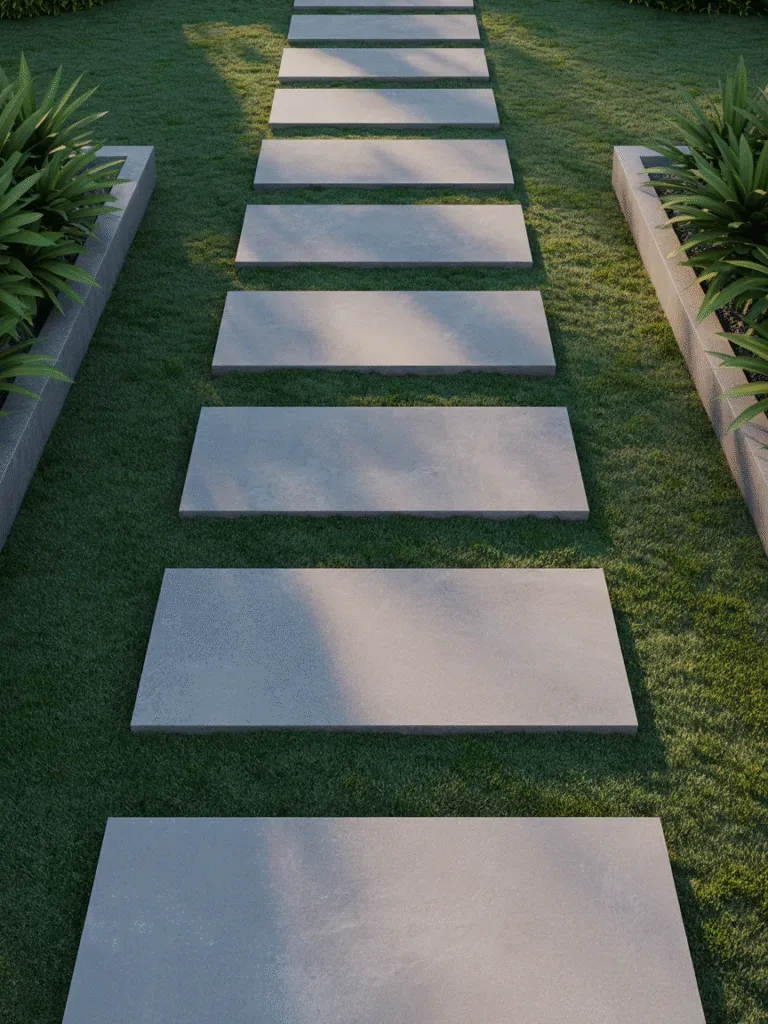
Want something that looks high-end but doesn’t cost a fortune? Try combining large stepping stones with grass between the gaps. It gives a sleek, modern look while staying soft and natural. You can even cheat a bit and use artificial grass for a low-maintenance version. This style is especially great for front yards or courtyard gardens.
The layout:
- Place large pavers or stepping stones with gaps between
- Let grass grow in the spaces
Why it’s awesome:
- Looks super high-end
- Soft underfoot and eco-friendly
My tip:
- Use artificial grass if you want zero maintenance.
Supplies:
- Stepping stones
- Grass seed or turf
- Sand or fine gravel base
10. Stenciled Concrete Walkway
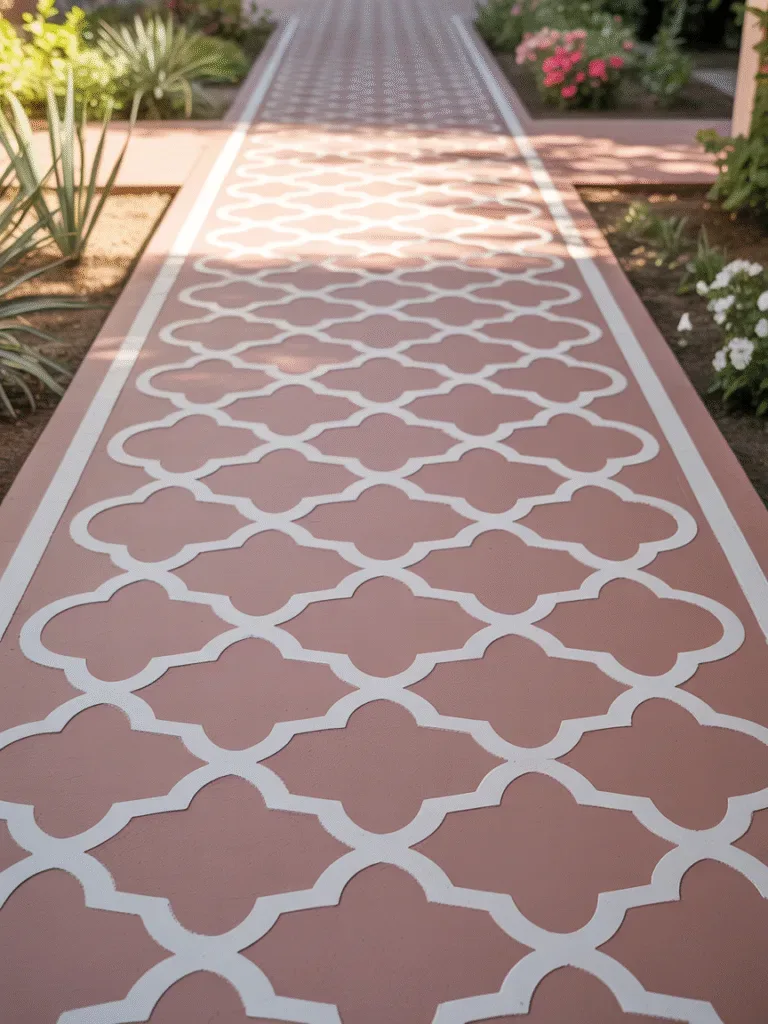
If you want something that looks like designer stonework without the hefty price tag, try stenciling your plain concrete walkway.
You just need a stencil (make one or buy), some outdoor paint or concrete stain, and a sealer. It’s budget-friendly and fully customizable.
I once did a Moroccan-style pattern, and people still think it’s tile!
How it works:
- Clean the concrete thoroughly
- Lay your stencil flat and secure
- Roll or brush on your paint or stain
Tips for success:
- Use weatherproof outdoor paint
- Apply a clear sealer for long-lasting finish
Supplies:
- Concrete walkway
- Paint/stain + stencil
- Clear topcoat sealer
11. Slate Chip Walkway
Slate chips (or stone chips) are a low-cost but high-impact material for walkways. They’re especially beautiful in modern or minimalist gardens. Lay landscape fabric, add a sturdy edge, and pour the chips. The result? A sleek, stylish path that crunches underfoot and looks way more expensive than it is.
What to do:
- Prepare your base with fabric
- Pour in the slate chips
- Compact and level the surface
Why it’s great:
- Low maintenance and elegant
- Works well with modern designs
You’ll need:
- Slate chips or crushed slate
- Edging material
- Landscape fabric
12. Straw or Pine Needle Pathway
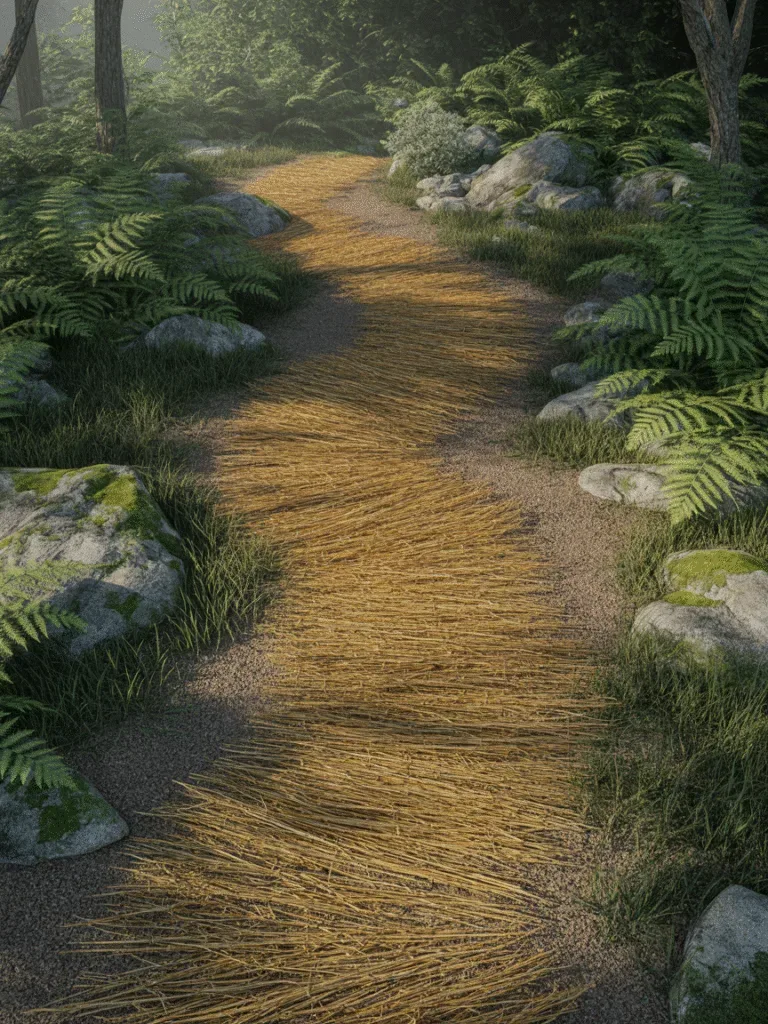
This one’s perfect for woodland gardens or casual veggie patches. It’s literally just straw or pine needles laid thickly over packed dirt or fabric. It’s not for everyone, but if you love a natural look and earthy scents, you’ll love this. Super cheap, biodegradable, and charming in a forest-y way.
How it works:
- Lay down landscape fabric
- Pile on straw or pine needles
- Rake smooth to level
Best for:
- Garden beds or forest trails
- Temporary or seasonal paths
Essentials:
- Straw or pine needles
- Landscape fabric (optional)
13. Checkerboard Paver and Grass Path
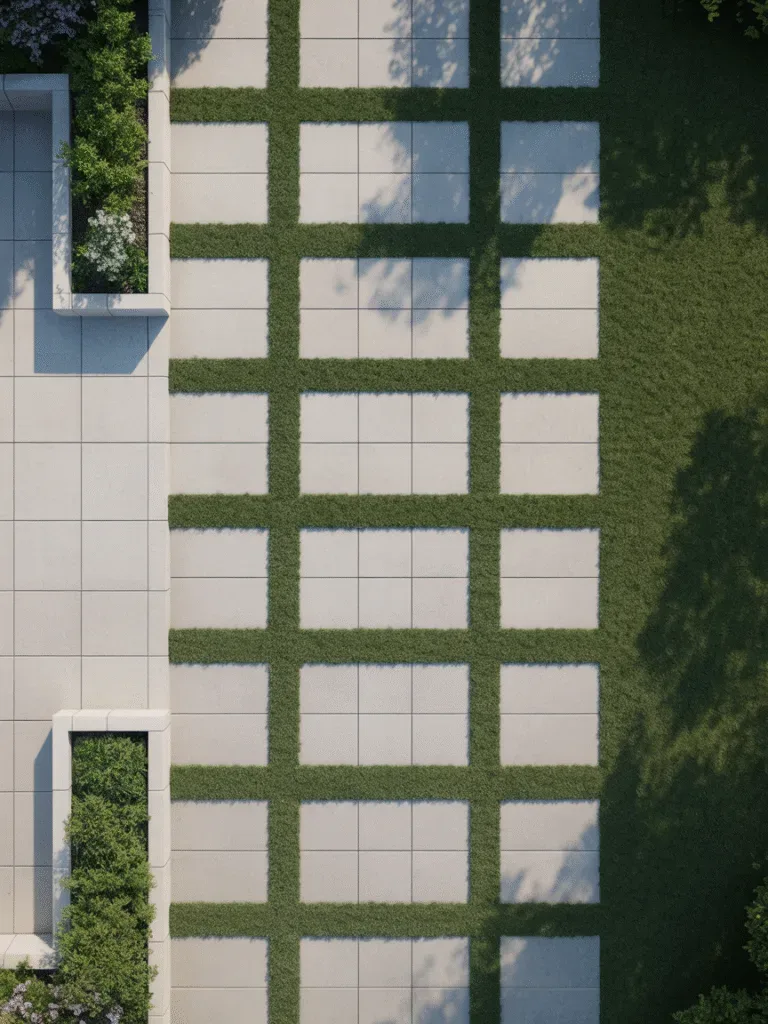
This one adds a modern, geometric vibe to your yard. Place square concrete or stone pavers in a grid layout, leaving space between each one to fill with grass or moss.
It’s an eye-catcher for sure, and super functional too. I tried it near my outdoor dining area and it really elevated the whole look.
Steps to build:
- Space pavers evenly in a grid
- Fill gaps with grass or sod squares
- Keep everything level and tight
Why it rocks:
- Modern visual appeal
- Great for patios or entryways
Materials:
- Square pavers
- Grass sod or seed
- Sand/gravel base
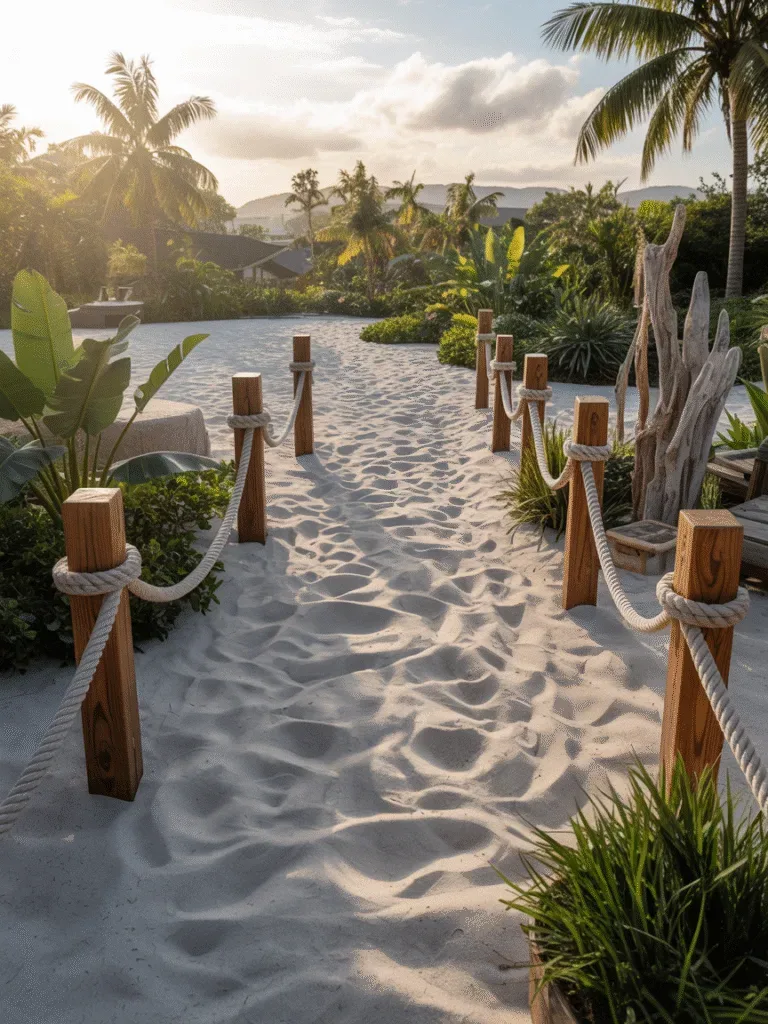
14. Rope Border Sand Path
Ever been to a beach resort? This gives the same feel! You make a simple path out of fine sand, and use thick nautical rope for edging. It’s a great option for cottage gardens or near a fire pit. I did this once for a summer gathering spot and it felt like walking in a vacation ad.
How to build it:
- Level the path area
- Pour in and spread fine sand
- Edge with thick rope held by stakes
Why it’s fun:
- Soft underfoot and easy to refresh
- Great beachy aesthetic
Materials:
- Fine sand
- Thick rope
- Wooden stakes
15. Cobblestone-Inspired Path With Concrete Molds
Get the old European look without importing cobblestones! Buy or make a reusable cobblestone mold, fill it with concrete, and repeat until you have a whole path. This DIY trick is way cheaper and lets you control the shape, spacing, and color.
Steps to try:
- Mix and pour concrete into mold
- Set, cure, and shift mold down the path
- Seal for longevity
Why it works:
- Timeless design
- Easy to make over a weekend
Tools/Materials:
- Plastic walkway mold
- Concrete mix
- Trowel + sealer
Image Prompt
A 4K overhead image of a DIY cobblestone-style walkway made with concrete molds, featuring rounded stones in soft gray tones, framed by low greenery and flowers, dappled sunlight with clear stone textures, slightly curved design in a cozy backyard.
16. Brick and Gravel Combination Path
Can’t decide between brick and gravel? Do both! This path uses gravel as a base, with bricks spaced evenly apart to serve as stepping pads. It’s casual, chic, and gives you the best of both worlds. Perfect for narrow garden trails or informal walkways.
Building basics:
- Create a gravel base
- Embed bricks at intervals
- Frame with edging if needed
Perks:
- Budget-friendly
- Low effort but high impact
What to use:
- Old bricks
- Pea gravel
- Edging material
17. Stepping Stone Path With Ground Cover
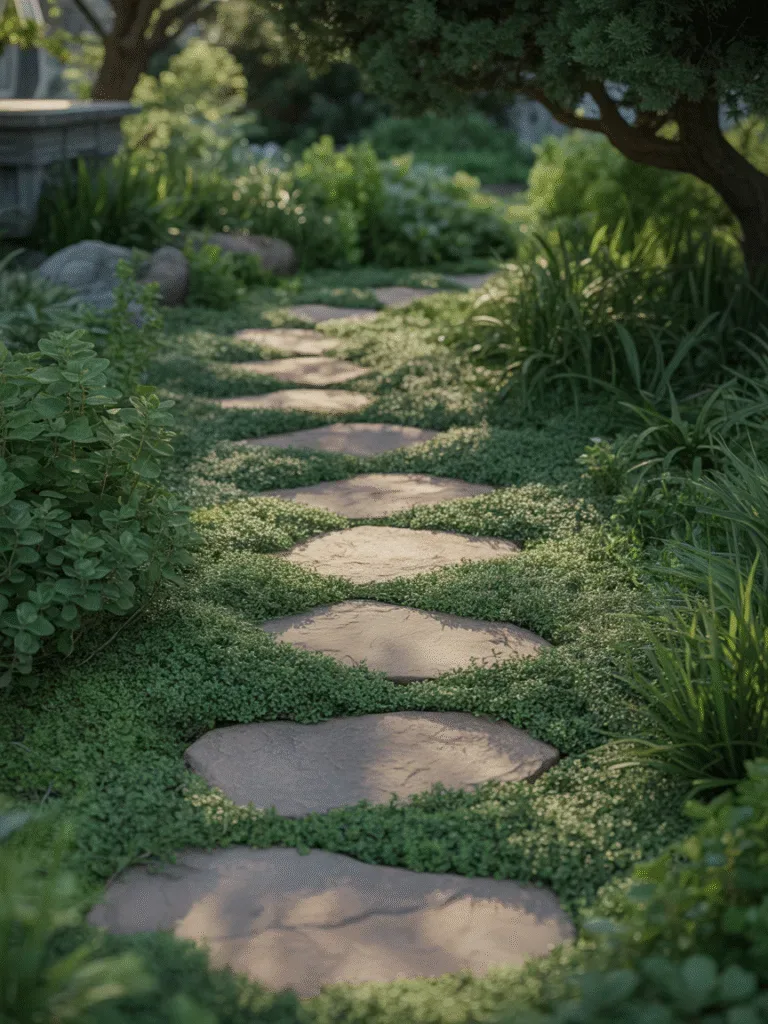
Want something ultra-natural? Set large flat stones like flagstone into the soil, and plant ground cover like creeping thyme or moss around them.
It creates a soft, magical trail that feels like it’s been there forever. I did this under a tree arch and it’s my secret garden now.
Steps to create:
- Set stones at walking intervals
- Add soil and plant ground cover
- Water and wait for it to fill in
Why it’s lovely:
- Blends with nature
- Soft, scented underfoot
What you need:
- Flat stones (flagstone/slate)
- Ground cover seeds/plants
- Soil + trowel
Common Mistakes to Avoid
Let’s save you some headaches:
- Skipping landscape fabric – weeds will find a way, always.
- Not leveling the base – wobbly paths aren’t cute or safe.
- Using untreated wood – it’ll rot so fast. Trust me, I learned the hard way.
- Ignoring edging – stuff spills, paths shift. Edge it well!
- Going too narrow – anything under 2 feet wide feels cramped.
FAQ
How much should I budget for a DIY walkway?
It depends on materials, but many of these can be done for under $100 if you source smartly or reuse materials. Gravel, wood, or bricks are some of the most budget-friendly options.
Can I build a walkway without digging?
Yes! Options like stepping stones in grass or pallet wood on gravel don’t require deep digging. Just clear the surface and level it well.
Do I need special tools?
Not necessarily. Most projects just need basic hand tools like a shovel, hammer, trowel, level, and maybe a saw. Rent or borrow anything bigger.
How long will a DIY walkway last?
If installed right, 5–10 years or more, especially with materials like brick, gravel, or treated wood. Just keep up on minor maintenance like weed control.
Final Thoughts
Creating a walkway doesn’t have to mean hiring a contractor or blowing your budget. With a little creativity, elbow grease, and maybe some help from friends or family, you can totally pull off one of these 10 cheap walkway DIY ideas.
Pick the one that fits your vibe and space best—whether that’s cozy cottage, beachy coastal, or boho eclectic—and have fun with it! Honestly, once you finish, you’ll feel like a total rockstar every time you walk outside.
Got any leftover bricks, pallets, or random tiles? Don’t toss them—make a path to somewhere beautiful.